今回はサーバーにOpenLiteSpeedをインストールしてWordPressを入れてみたのでメモ程度に残しておきます。
OpenLiteSpeed は LiteSpeed のオープンソースで第4世代のWebサーバーです。
処理速度が他のWebサーバーより速いといわれているのが特徴です。
有名どころのサーバーだとmixhostがLitespeedを挿入していますね。
ここでは Litespeed については解説しませんので詳細は以下をご覧ください。
また、別記事で書いたサーバーコントロールパネルのcyberpanelをインストールすることでOpenLiteSpeedも一緒にインストールすることができます。
cyberpanelとOpenLiteSpeedは提供元が同じです。
WordPressを入れる場合も下記の方法の方がこっちの記事より簡単です。
今回の環境ですが、CentOS8を使っています。またサーバーパネルにaaPanelを入れてしまっているので一部インストール済みのものがありますのでご容赦ください。
では、早速インストールしていきます!
Litespeedのインストール
以下を参考にインストールしていきます。
以下のコマンドで順にインストールしていきます。
rpm -ivh http://rpms.litespeedtech.com/centos/litespeed-repo-1.1-1.el8.noarch.rpmyum install openlitespeedyum install epel-release
yum install lsphp73 lsphp73-common lsphp73-mysql lsphp73-gd lsphp73-process lsphp73-mbstring lsphp73-xml lsphp73-mcrypt lsphp73-pdo lsphp73-imap lsphp73-soap lsphp73-bcmath
ln -sf /usr/local/lsws/lsphp73/bin/lsphp /usr/local/lsws/fcgi-bin/lsphp5openlitespeed を起動
systemctl start lsws
接続用ポートを開けます。
firewall-cmd --zone=public --add-port=7080/tcp --permanent
firewall-cmd --reload
openlitespeed のパスワード変更
/usr/local/lsws/admin/misc/admpass.shPlease specify the user name of administrator.
This is the user name required to login the administration Web interface.
User name [admin]: AdminXXXX
Please specify the administrator’s password.
This is the password required to login the administration Web interface.
Password:
Retype password:
Administrator’s username/password is updated successfully!
上記のような出力が順番にでてくるので User name と Password を入力してください。
管理画面にアクセス
https://[address]:7080
今回はSSLの設定をしていないけど、無視して詳細からアクセスすると以下の画面がでます。
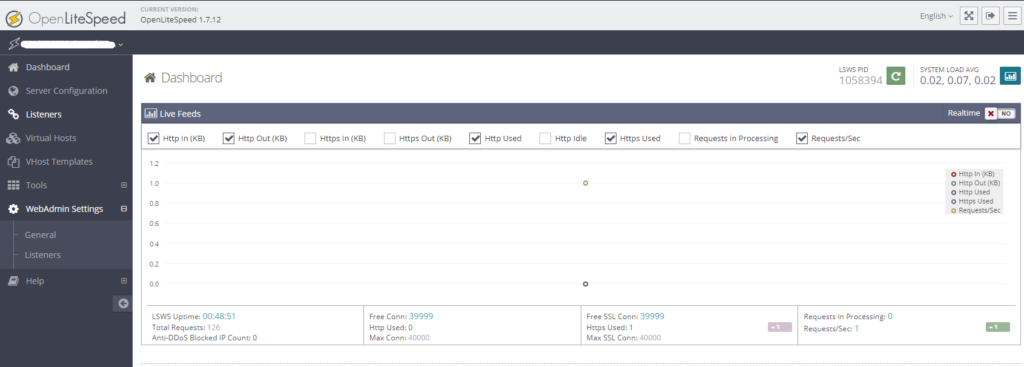

右上に「日本語」設定があるので「日本語」にします。
PHPのインストール
参考:https://www.litespeedtech.com/open-source/litespeed-sapi
LiteSpeedはLiteSpeed向けに最適化された LSAP がありますのでこれをインストールしていきます。
まず、管理画面のツールからPHPのバージョンを選びます。

次へ。
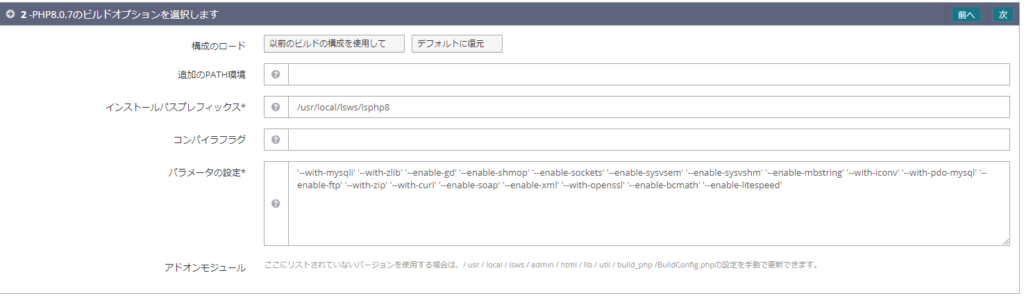
'--with-mysqli' '--with-zlib' '--enable-gd' '--enable-shmop' '--enable-sockets' '--enable-sysvsem' '--enable-sysvshm' '--enable-mbstring' '--with-iconv' '--with-mcrypt' '--with-pdo-mysql' '--enable-ftp' '--enable-zip' '--with-curl' '--enable-soap' '--enable-xml' '--enable-json' '--with-openssl' '--enable-bcmath' '--enable-exif' '--enable-gd-native-ttf' '--with-jpeg-dir=/usr/lib/x86_64-linux-gnu/libjpeg.so' '--with-png-dir=/usr/lib/x86_64-linux-gnu/libpng.so' '--with-freetype-dir' '--with-xmlrpc' '--with-gettext' '--with-bz2' '--enable-litespeed' '--enable-opcache'今回は8.07を入れてみることにしました。パラメータの設定は上記のようにしています。初期のパラメータだとなんか不足してる。
次へ
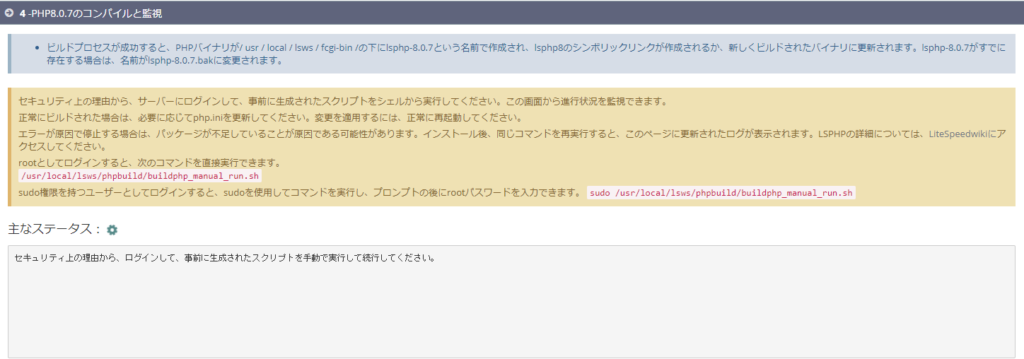
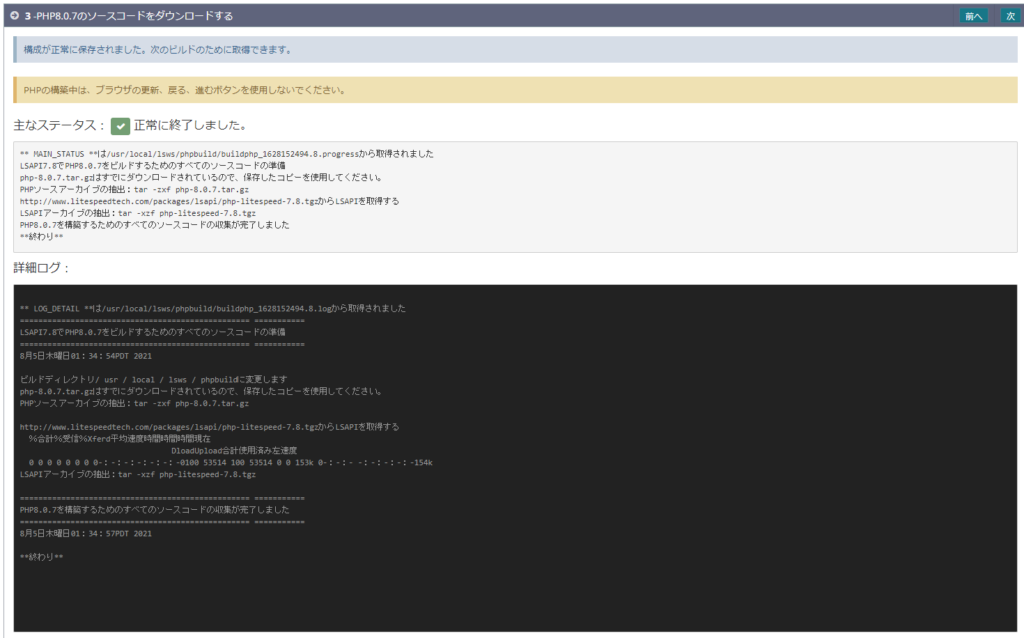
ここまでいったら以下をターミナルから実行します。
/usr/local/lsws/phpbuild/buildphp_manual_run.shDBのインストール
以下のDB関連はインストール済みです。事前にaapanelサーバーパネルをインストールしていたのでついでに入れてしまってました。
今回の環境ではインストール済みなので今回は割愛します。参考程度の記載を残しておきます。
DBは MySQL か MariaDB をインストールしてください。どっちか決めてインストールしてください。
MySQL
参考
https://www.mysqltutorial.org/install-mysql-centos/
MySQL の yum リポジトリ、インストールします。
rpm -ivh https://dev.mysql.com/get/mysql80-community-release-el7-1.noarch.rpm
yum -y install mysql-community-devel
yum -y install mysql-community-server


mysql_secure_installation
最後のコマンドはパスワード設定です。
起動、自動起動設定
systemctl start mysqld
systemctl enable mysqld
mariaDB
参考
https://mariadb.com/ja/resources/blog/installing-mariadb-10-on-centos-7-rhel-7/
yum -y install mariadb-server
systemctl enable mariadb
systemctl start mariadbmysql_secure_installationphpMyAdmin
参考
https://docs.phpmyadmin.net/en/latest/setup.html
phpMyAdminでWordPress用のDBを新規で作成しておいてください。コマンドラインからの作成でもOKです。
あとで、データベース名、ユーザ名、パスワードが必要になります。
バーチャルホストの作成と設定
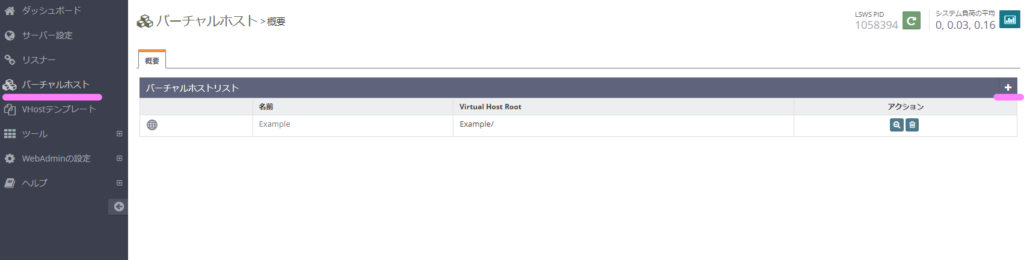
管理画面のバーチャルホストを選択し「+」を押して追加します。
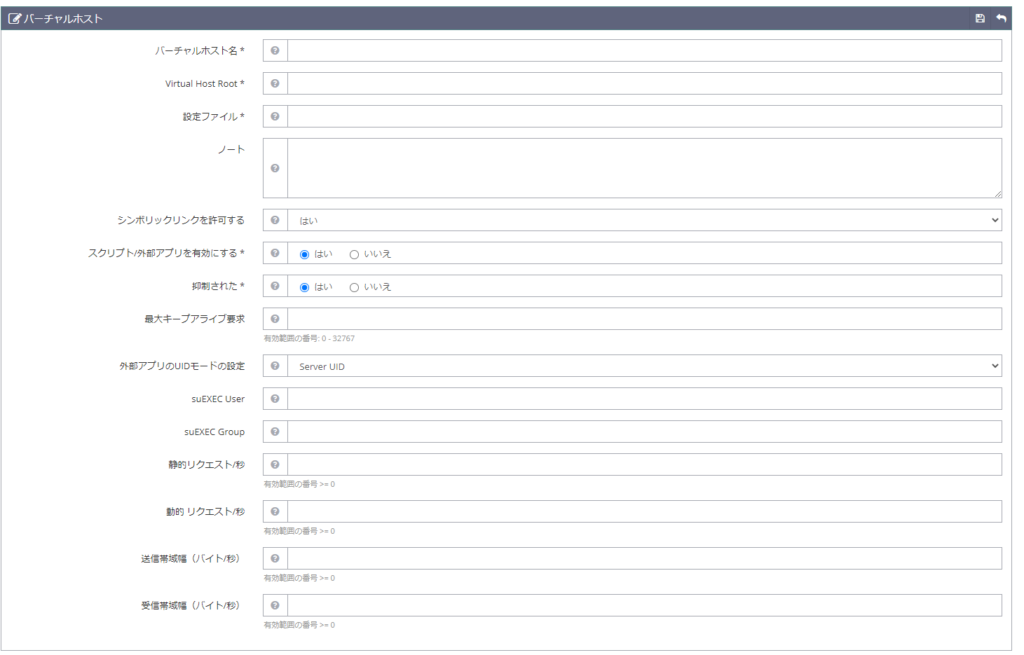
この画面で以下を設定します。
- バーチャルホスト名:wordpress
- Virtual Host Root:/var/www/wordpress
- 設定ファイル:$SERVER_ROOT/conf/vhosts/wordpress/vhconf.conf
- シンボリックリンクを許可する:はい
- スクリプト/外部アプリを有効にする:はい
- 抑制された:はい
- 外部アプリのUIDモードの設定:Server UID
バーチャルホストのWordPressという部分は任意の名前でOKですが、 バーチャルホストのドメイン名をバーチャルホスト名として使用することをお勧めします。
バーチャルホストのルートディレクトリを指定してください。
設定ファイルは、$SERVER_ROOT/conf/vhosts/ディレクトリの下にしてください。
右上の保存ボタンを押して、以下がでたら「クリックして作成」を押します。

作成したらホスト名の部分をクリックして、以下の「一般」タブから以下を設定します。
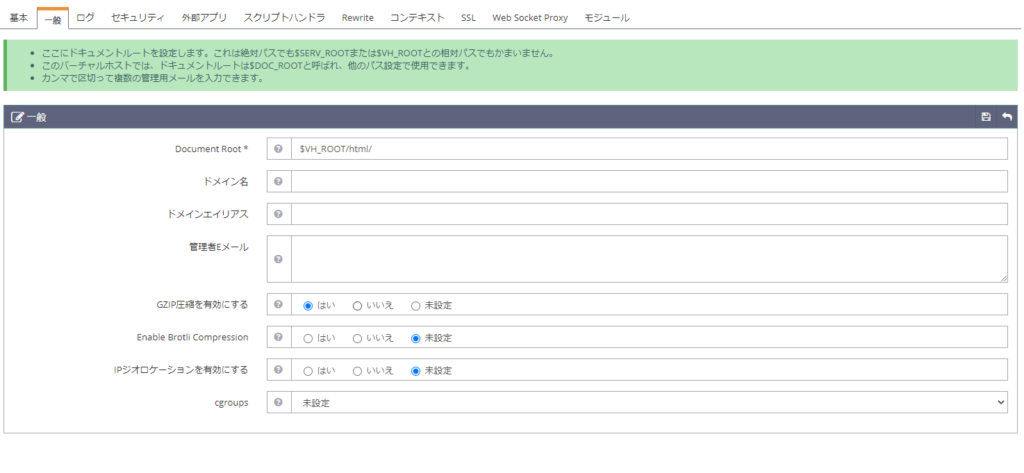
以下のように設定ます。
- Document Root:$VH_ROOT/html/
- GZIP圧縮を有効にする:はい
リスナーの設定
「Listeners」を選択し先に作ったVirturalHostを紐づけます。
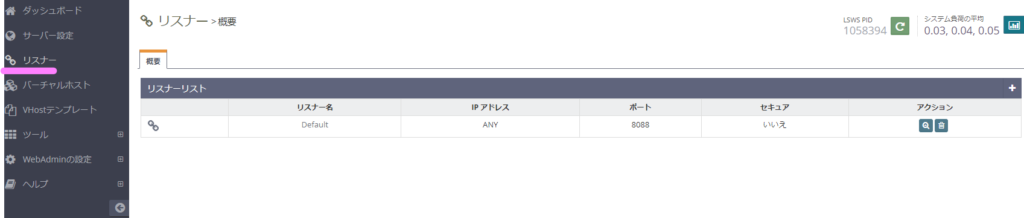
「Default」をクリックします。

編集ボタンをクリックします。
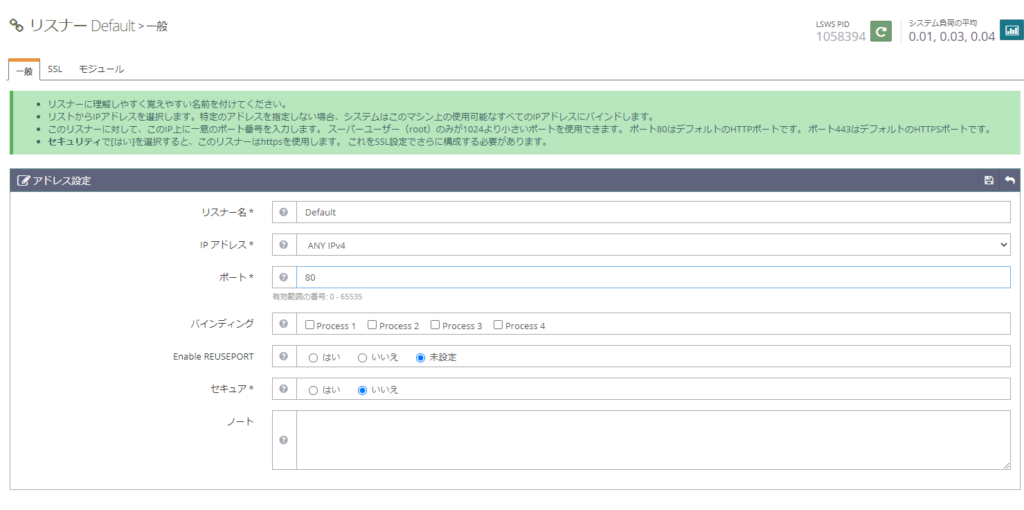
ポートを 80 に変更します。
次にバーチャルホストマップを設定ます。
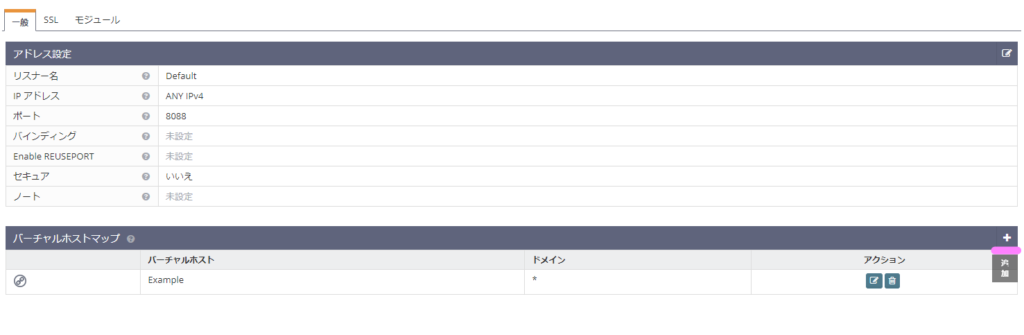
デフォルトで入っていたExampleは削除し、追加を押します。
※Exampleは * 設定なのですべてのアクセスがこっちにいってしまうかもしれません。
トラブル防止のため消すのが無難ですが、設定を後でみたいとかあるならアスタリスクを消して適当なドメイン名を変更しておけばたぶんOKだと思う。
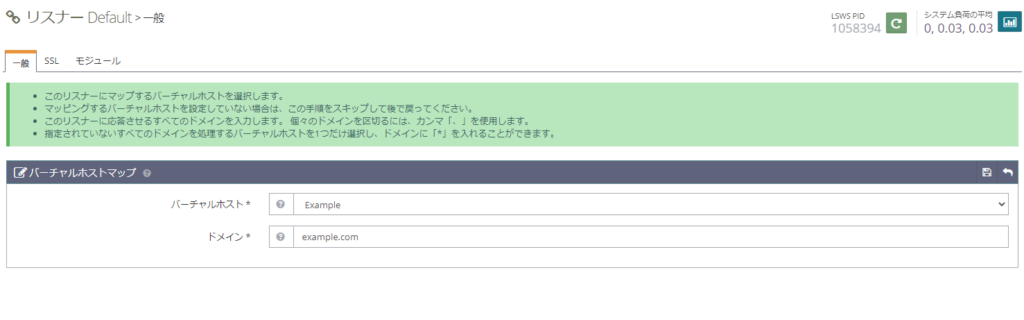
バーチャルホストを選択し、ドメインを入力してください。
次に Rewriteルール を変更します。

Rewriteを有効にするに「はい」を設定。
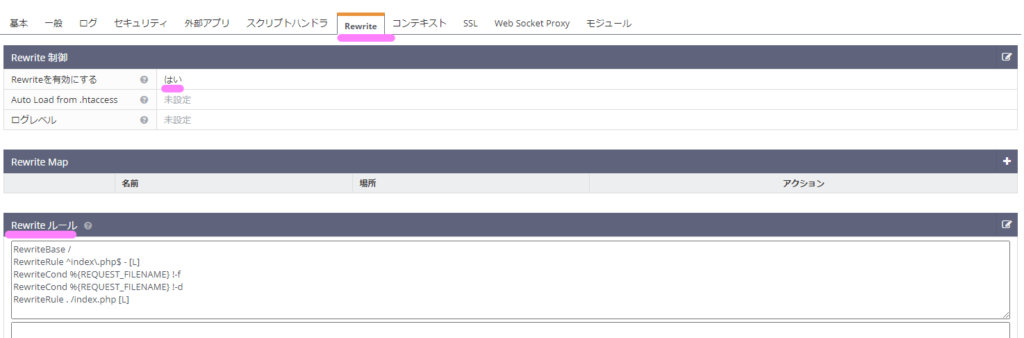
Rewrite ルールに以下を追加します。
RewriteBase /
RewriteRule ^index\.php$ - [L]
RewriteCond %{REQUEST_FILENAME} !-f
RewriteCond %{REQUEST_FILENAME} !-d
RewriteRule . /index.php [L]
これで http://ドメイン名/ にアクセスすると。
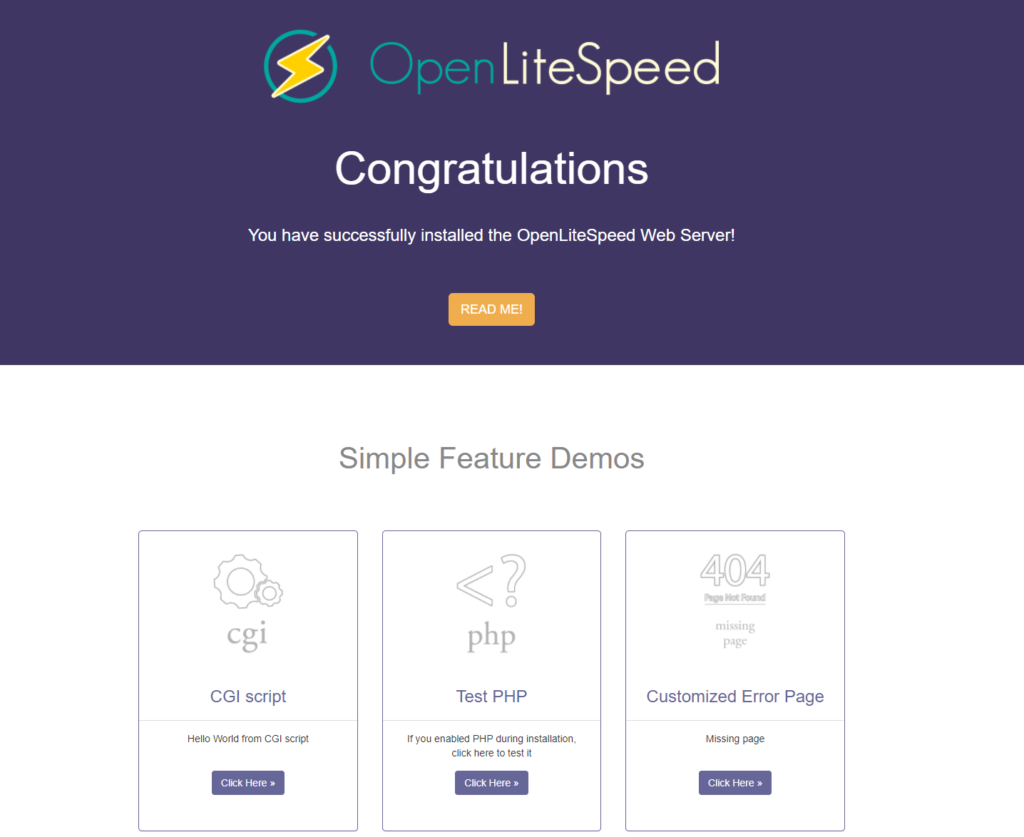
できました!
WordPressのインストール
WordPressのインストールについての参考
ターミナルでドキュメントルートに移動し、WordPressをダウンロードします。
wget http://ja.wordpress.org/wordpress-5.8-ja.tar.gz
tar -xvf wordpress-5.8-ja.tar.gz
(必要ならば chown で所有者やグループを変更してください。)
展開したフォルダ配下にあるwp-config.phpファイルの該当部分にデータベースの情報を記載します。
/** WordPress のためのデータベース名 */
define( 'DB_NAME', 'database_name_here' );
/** MySQL データベースのユーザー名 */
define( 'DB_USER', 'username_here' );
/** MySQL データベースのパスワード */
define( 'DB_PASSWORD', 'password_here' );
これで http://ドメイン名 にアクセスすると!
以下となりました(;^_^A

今回はデータベース接続エラーがでたので、
wp-config.phpの
/** MySQL のホスト名 */define( 'DB_HOST', 'localhost' );define( 'DB_HOST', '127.0.0.1' );
define( ‘DB_HOST’, ‘localhost’ );を define( ‘DB_HOST’, ‘127.0.0.1’ ); に修正しました。
これで http://ドメイン名 にアクセスすると!
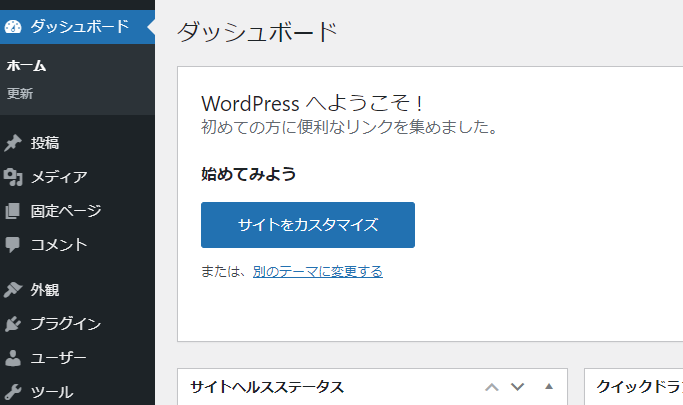
できました!
今回はスマートにいかなかったですがなんとかという感じです。
お疲れ様でした!
その他メモ
https://docs.litespeedtech.com/extapp/php/extensions/