
今回はFlutterFlowとFireBaseの連携してFlutterFlowのプロジェクトを作成するところまでやってみたいと思います。
FlutterFlowについてはこちらをご覧ください。
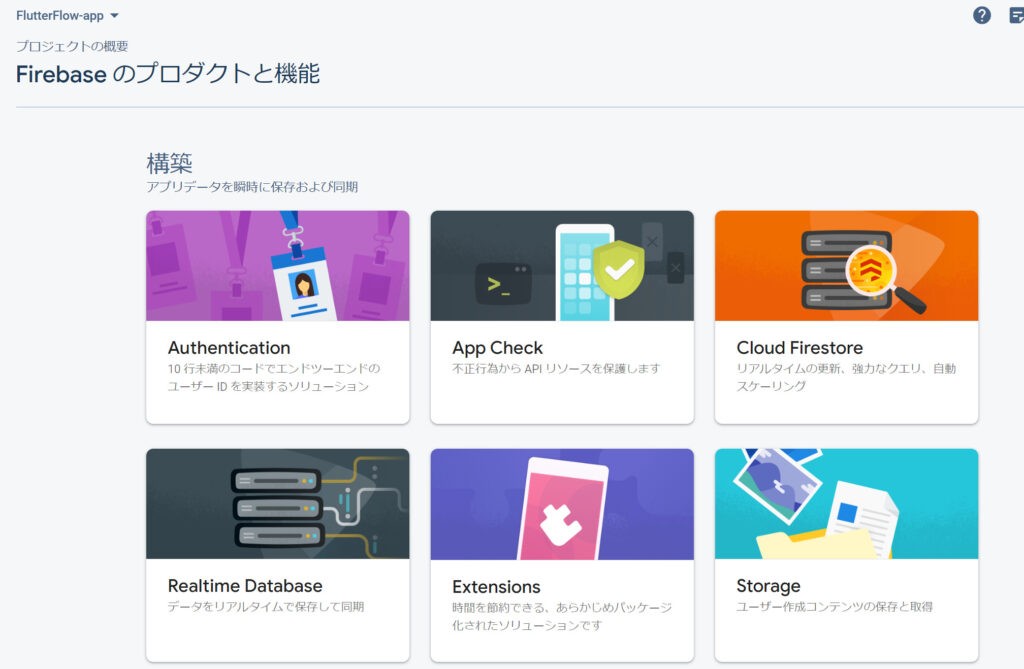
FlutterFlow で FireBase と連携する目的
FlutterFlowとFireBaseを連携する目的はユーザのログインなどの認証情報や、画像などのアセットをアプリから使用する場合に、情報の保存先として使用するために連携します。
特に使わないという方は連携は不要な操作になりますのでご注意ください。
Firebaseの設定

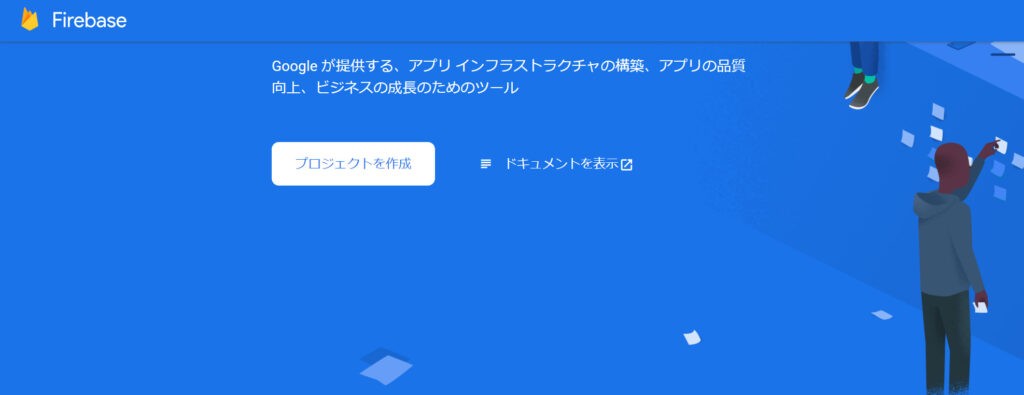
まずはfirebaseにログインします。
「使ってみる」をクリックします。
プロジェクトを作成します。
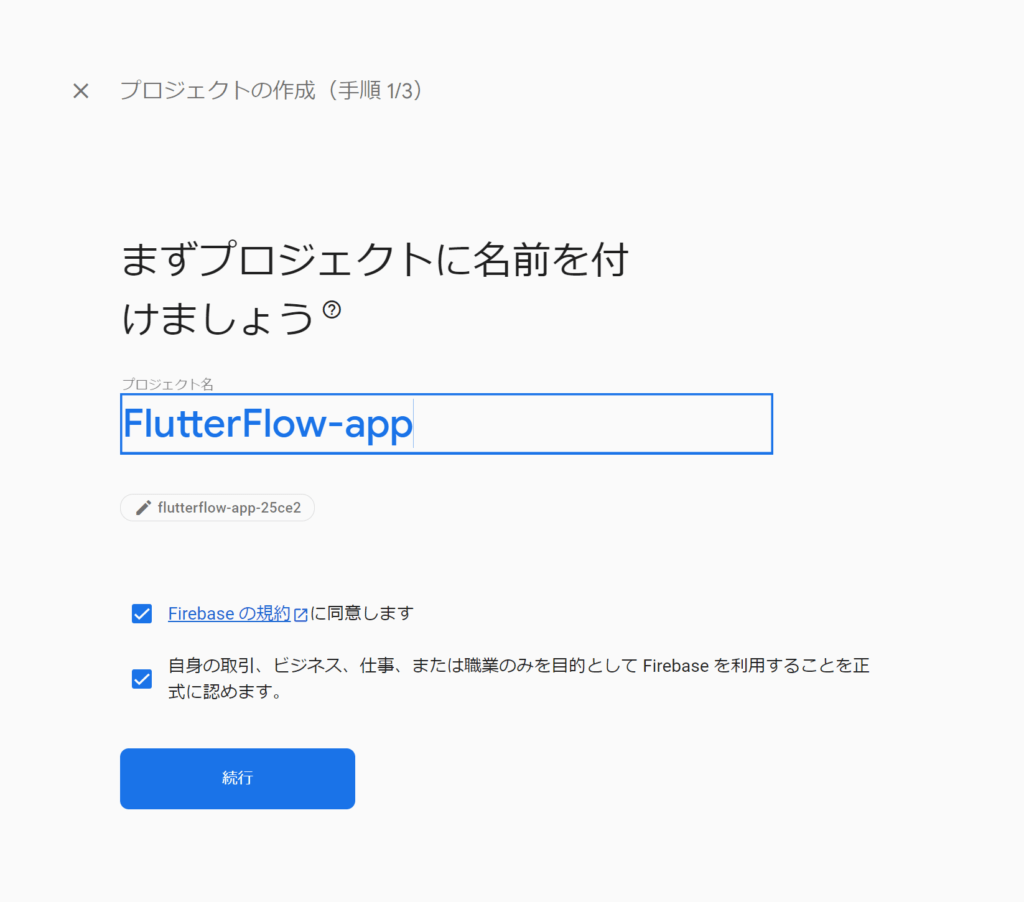
任意のプロジェクト名を付けたら、チェックボックスにチェックを入れて「続行」を押します。

今回アナリティクスは使いませんので「有効」をOFFにします。
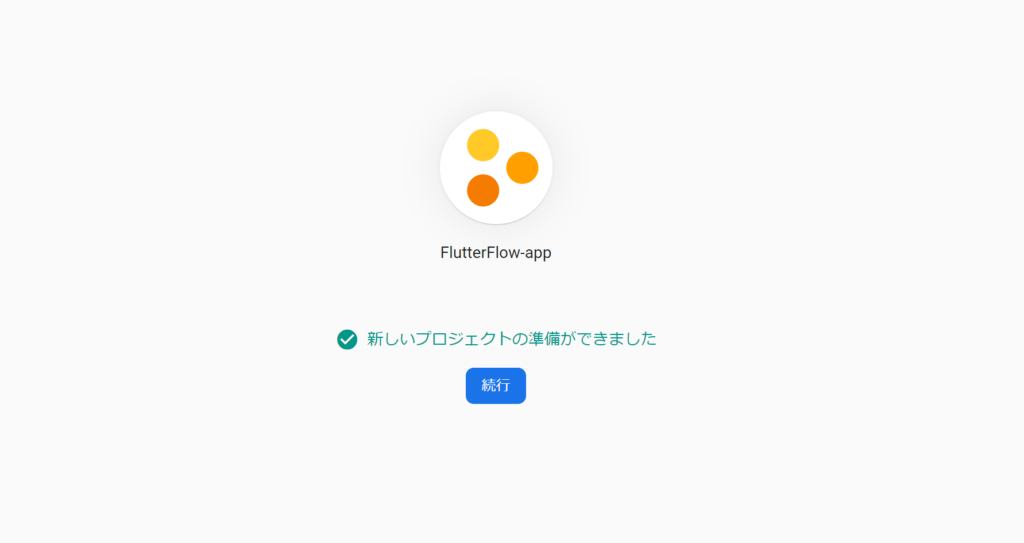
ダッシュボードに遷移すれば、Firebaseの事前設定は完了です。
FlutterFlowに接続するためには、Firebaseでいくつかの設定が必要となります。
まずは、FlutterFlowがFirebaseにアクセスするためのユーザーを追加していきます。
プロジェクトの設定
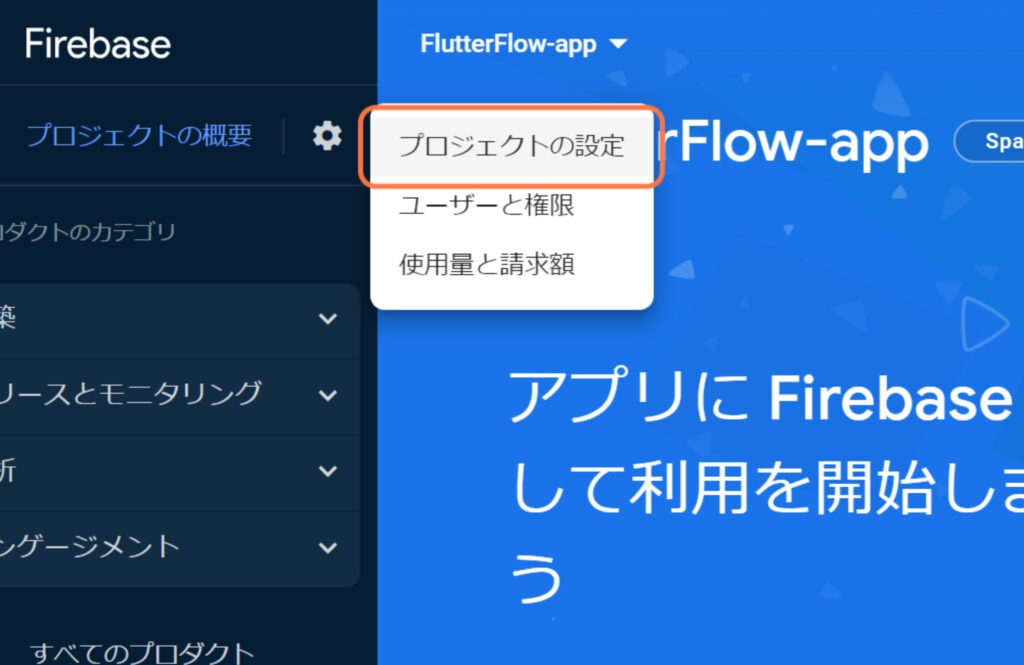
ここでは、プロジェクトに使う権限の設定などをしています。
サイドバーのプロジェクトの概要の横にある歯車マークより、「プロジェクトの設定」をクリックします。
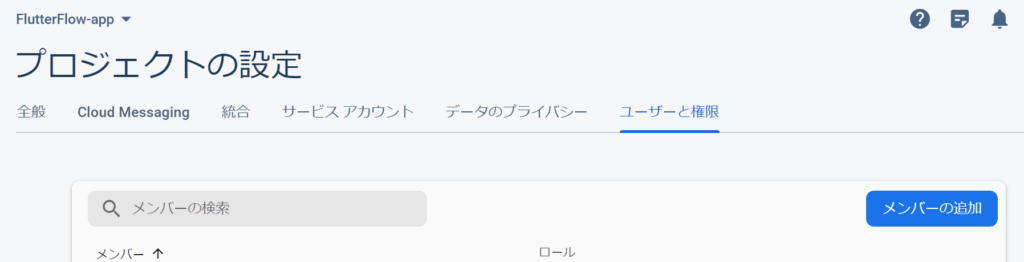
「メンバーを追加」を押します。
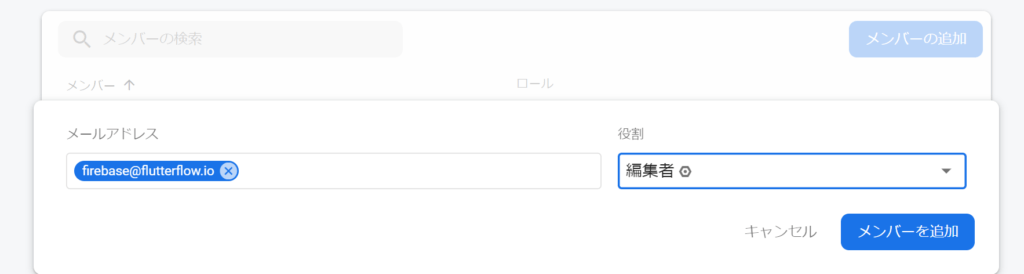
次に、メールアドレスとロールを以下のように設定します。
メールアドレス:firebase@flutterflow.io
ロール:編集者

権限に関する詳細設定に移動します。

firebase@flutterflow.ioを含む行の「メンバーの編集」(右端にある鉛筆マーク)を押します。
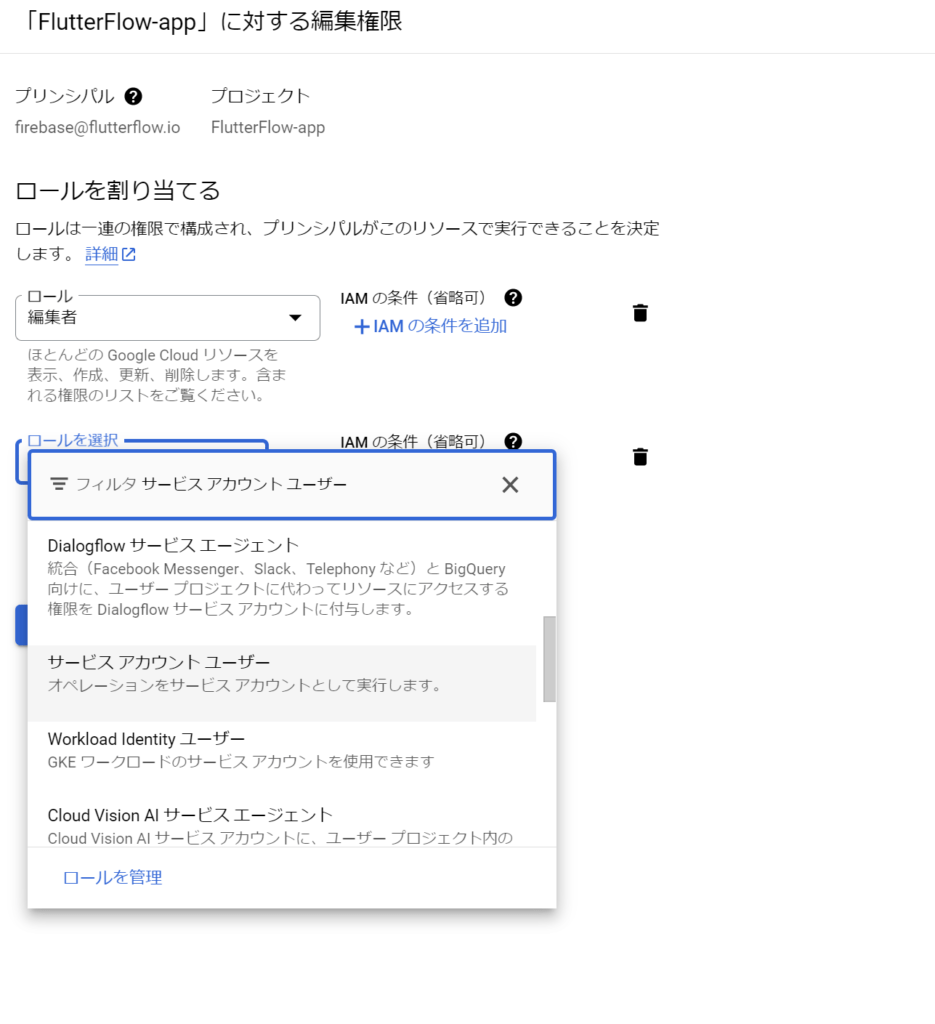
サービスアカウントユーザーを検索してクリックします。
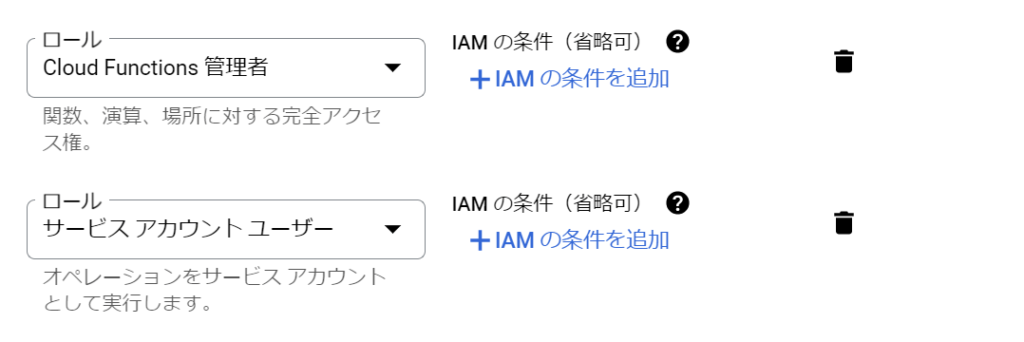
「Cloud Functions 管理者」と「サービスアカウントユーザー」を選択肢から選んで追加します。
Firestore データベースを構成する
FlutterFlowで使用するFirestoreの設定をします。
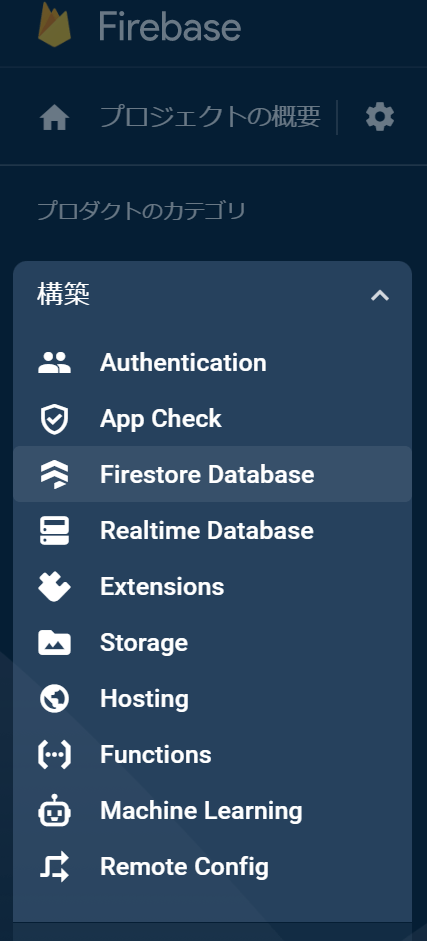
プロジェクトの Firebase ダッシュボードから、左端のメニューに移動します。
「Firestore データベース」を選択ます。

「データベースの作成」 を選択します。
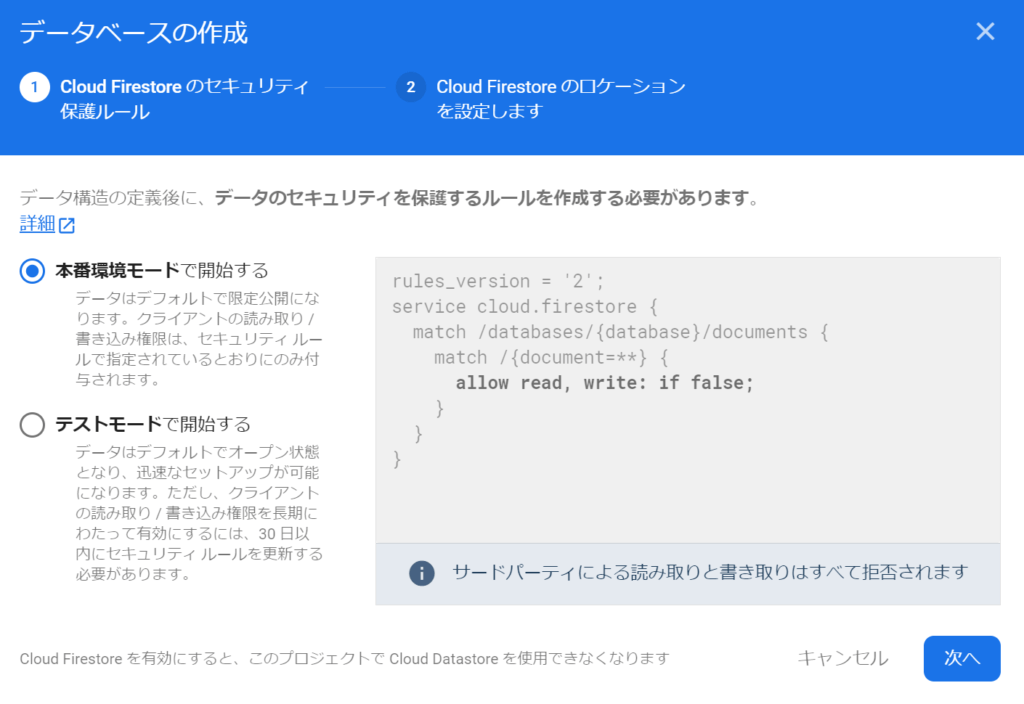
テストモード
テストモードの場合は、基本的に全てのアクセスが許可されています。 インターネットに公開しないで、開発する場合は、このモードを使うとまずは開発の基本的な機能の開発に集中できます。期限をつけて許可をしているので設定した日時(通常はデータベースを作成してから 30 日間)を過ぎるとアクセスができなくなります。
ロックモード(本番環境モード)
ロックモード(本番環境モード)デフォルト ルールは、すべてのユーザーに対してアクセスを拒否します。
とりあえず繋げること優先したい人はテストモードでOKです。
今回はテストモードして、テスト後にルールを変更する方法をとります。
テストモードだと以下の日時が指定されているはず。一定期間を過ぎるとアクセス拒否されると思いますが、書き直せばOKです。
allow read, write: if request.time < timestamp.date(2025, 1, 16);参考:セキュリティルール
https://firebase.google.com/docs/rules/basics?authuser=0&hl=ja
https://coconala.com/blogs/1638666/61563
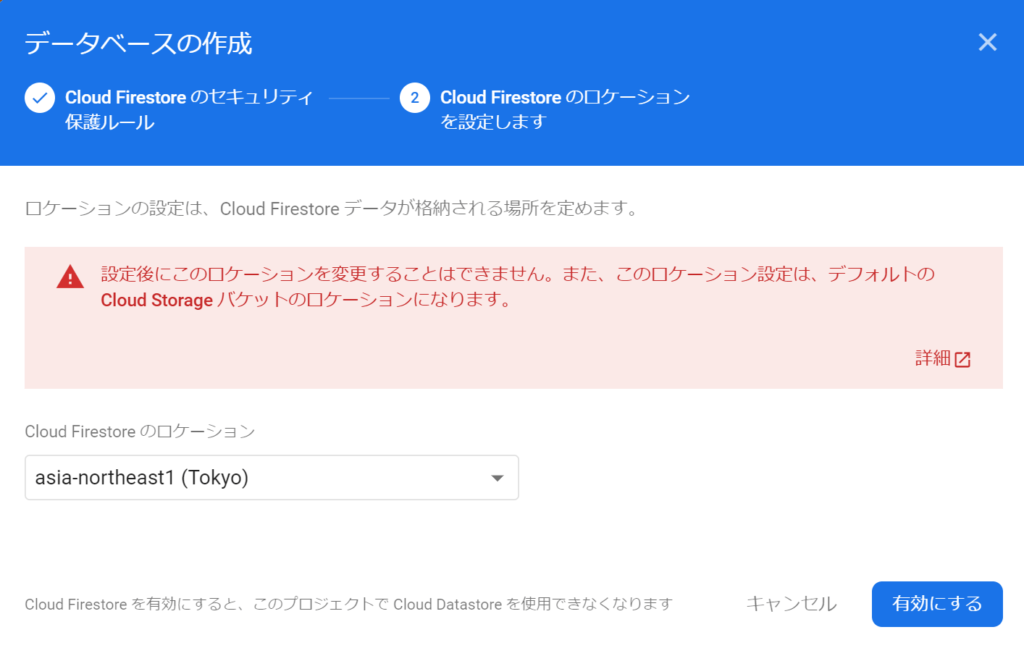
ロケーションは日本を選択します。
参考:ロケーション
https://firebase.google.com/docs/projects/locations?authuser=0&hl=ja
その他
認証を使いたい方はこっちも参考にしてください。
https://firebase.google.com/docs/auth?hl=ja
https://docs.flutterflow.io/data-and-backend/firebase/authentication
Authenticationを押します。

始めるを押します。
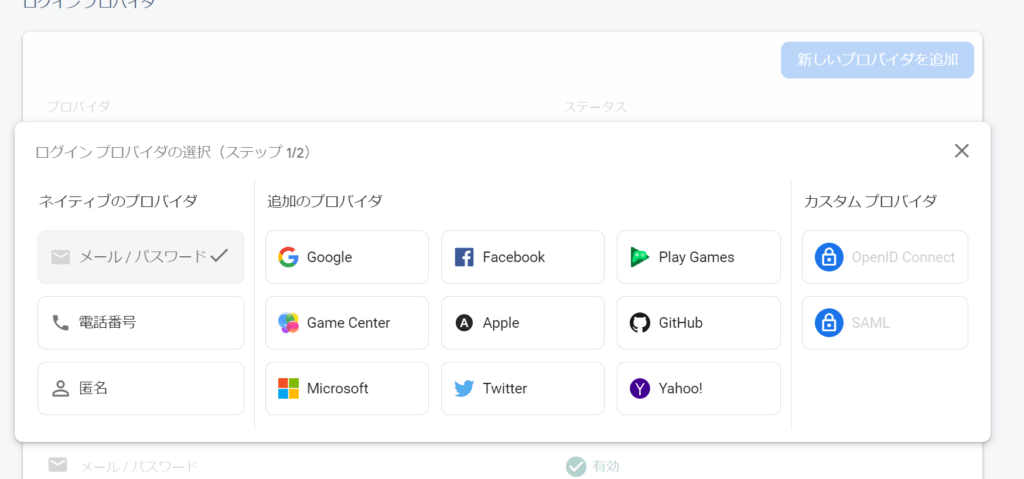
メール/パスワードを押します。

有効にします。
これでOKです。
FlutterFlowのFireBaseの設定
左メニューからプロジェクトの設定を選択します。
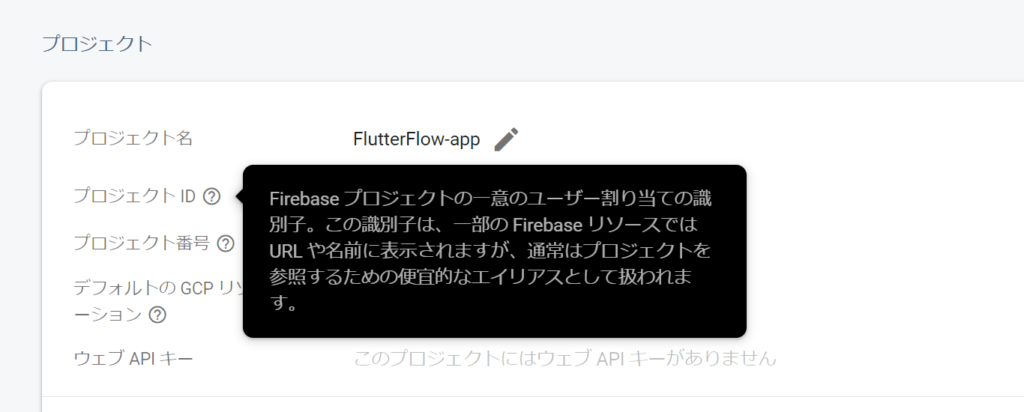
プロジェクトIDをコピーします。
FlutterFlowの画面に移動します。
https://app.flutterflow.io/dashboard

プロジェクト名をいれます。
テンプレートを選んでプロジェクトを新規に作成します。
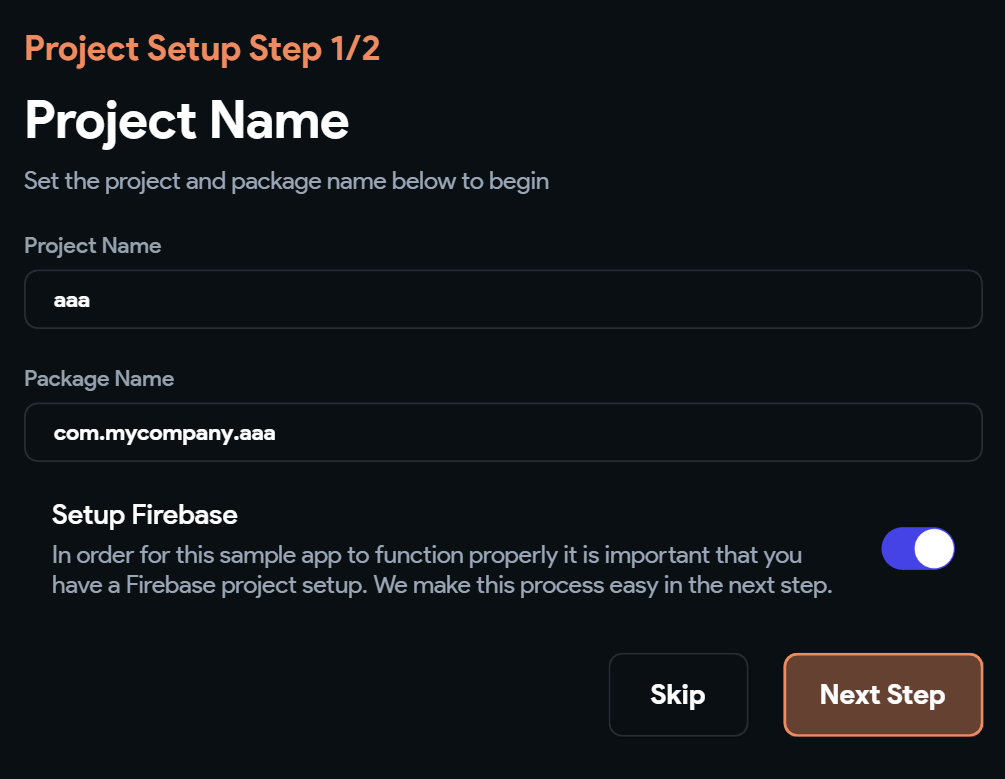
Setuo Firebaseにチェックを入れ次へ。
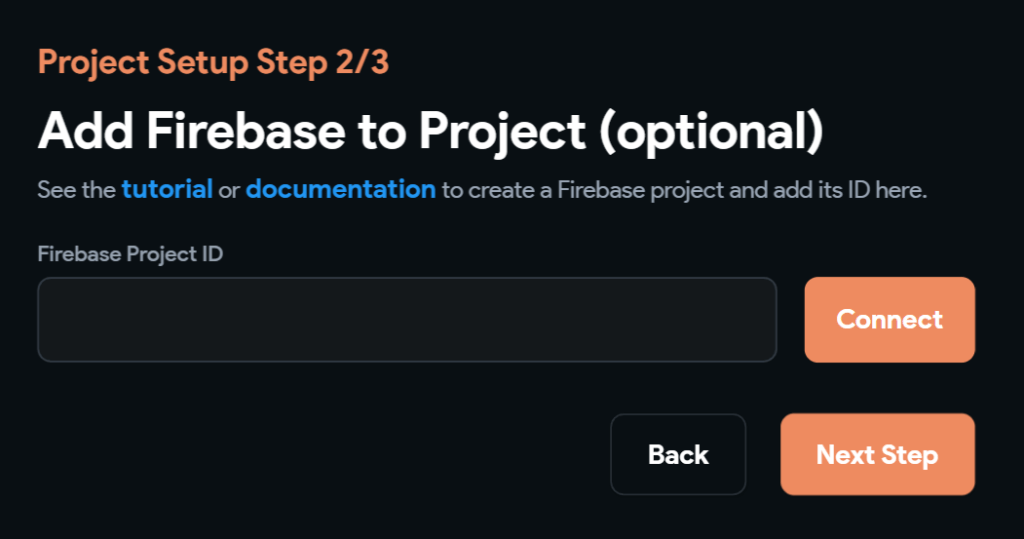
コピーしたFireBaseのプロジェクトIDを入力し、Connectを押します。
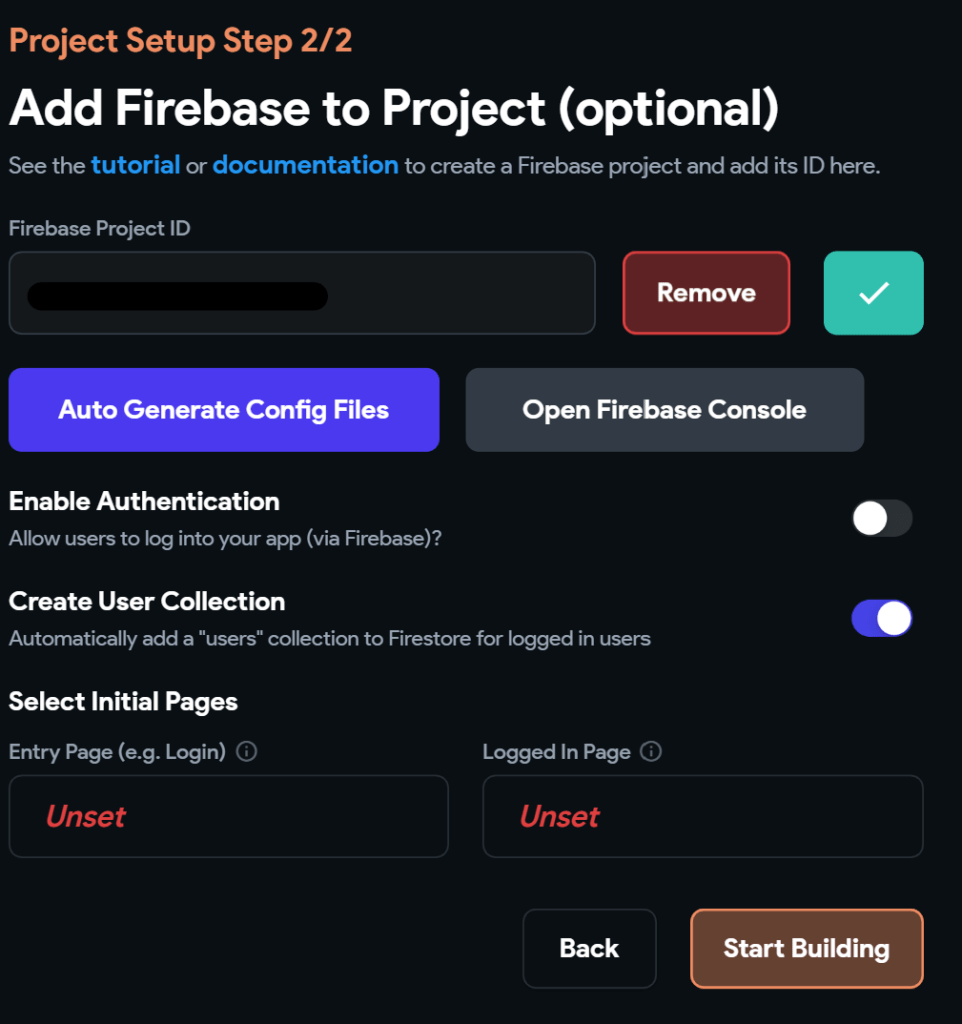
Auto Generate Config Filesをクリックしてください。
他のオプションは、Enable Authentication がユーザー認証機能、Create user Collectionがユーザーテーブルを自動生成してくれる機能です。
ユーザー登録画面とログイン画面を使う場合は、「Unset」をクリックしてテンプレートを選んでください。
Start Buildingを押せば完了です。
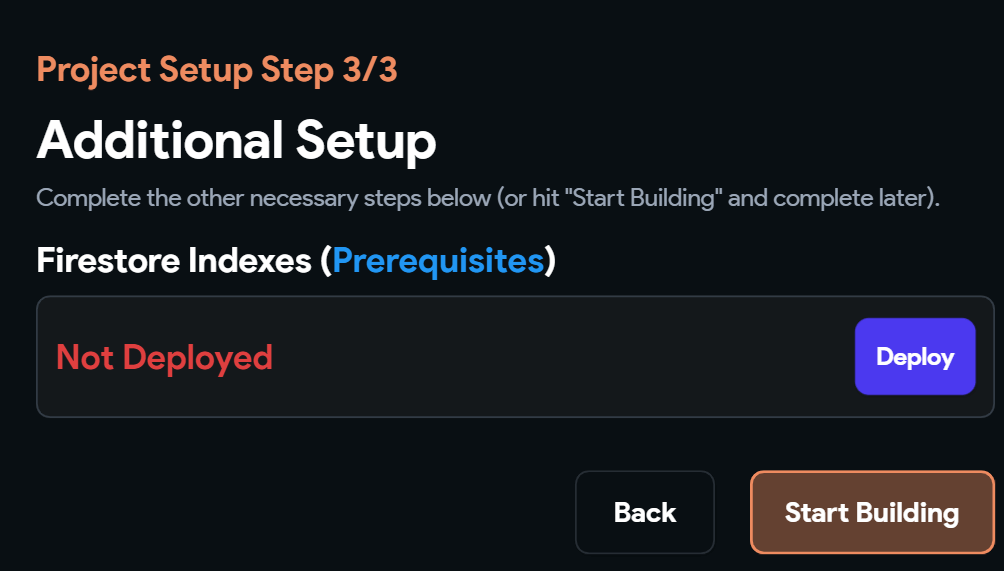
オプションによっては上記がでます。
DeployしてStart Buildingを押してください。
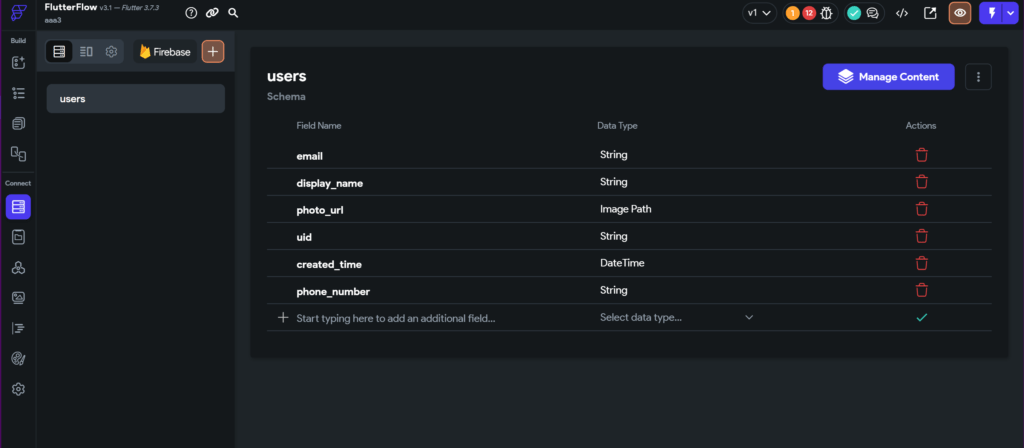
ユーザーテーブルを自動生成した場合は上記のようにユーザテーブルができてますね。
今回はここまでです。
お疲れ様でした!