今回はGASChatGPTとLineBotを使ってみようと思います。
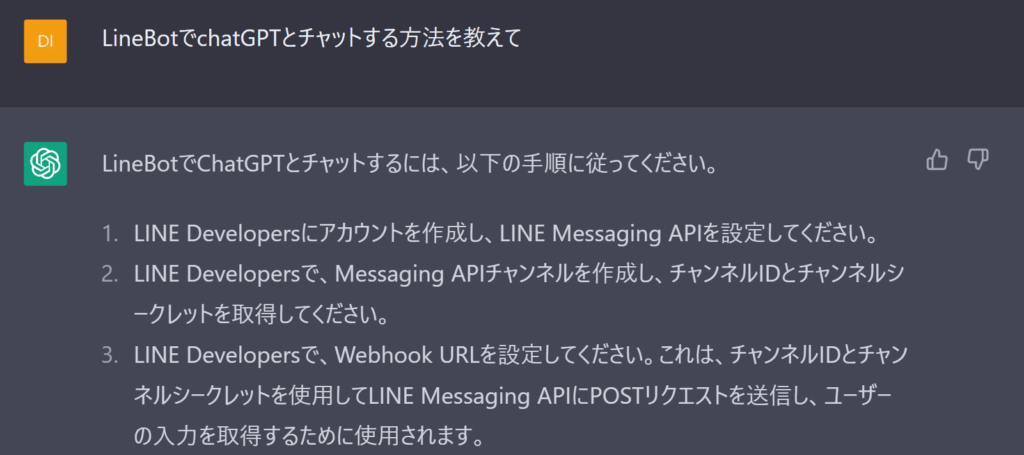
ちなみにchatGPTに質問してもなんだかんだ答えてくれます。
実装方法がいろいろあるので、やりたいことに合わせて聞いてやれば答えてくれます。
超優秀!
とりあえずでできたデモが以下です。

いろいろごにょごにょしているのでもしかしたら動かないこともないこともない。(^^;
動いていたら使ってやってください。
普通に使うには以下の記事をどうぞ。
では、本編です。
Line Developer に登録
まずは以下をクリックして Line Developer に登録します。
https://developers.line.biz/ja/
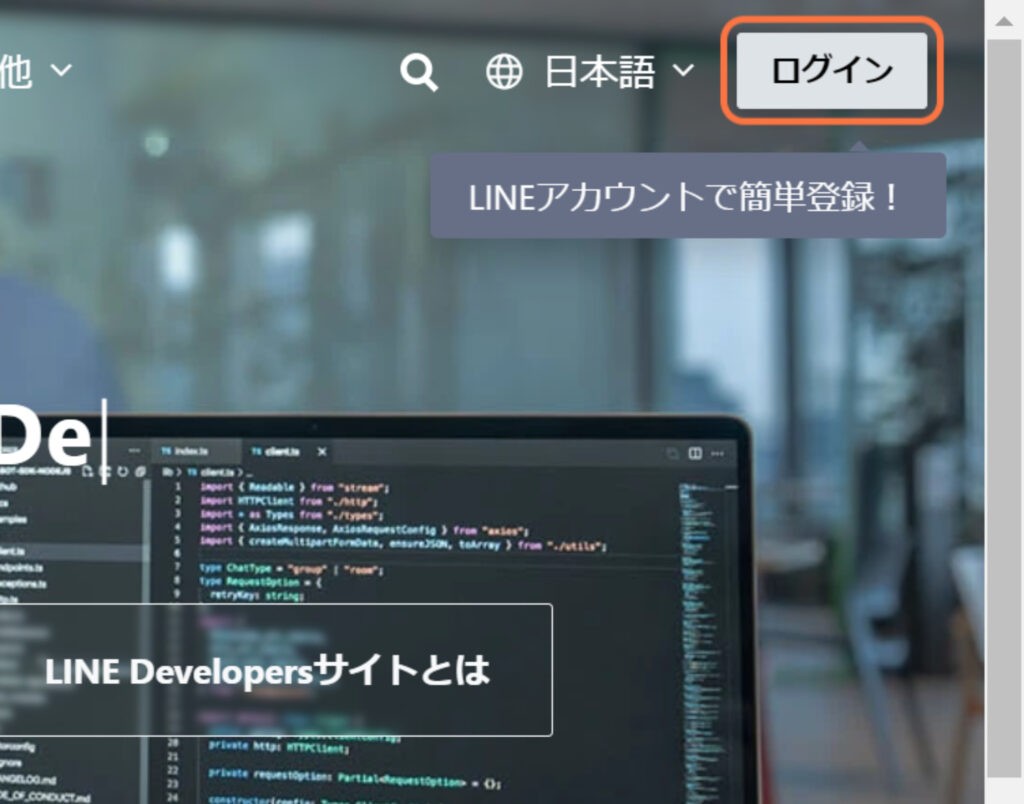
ログインを押します。
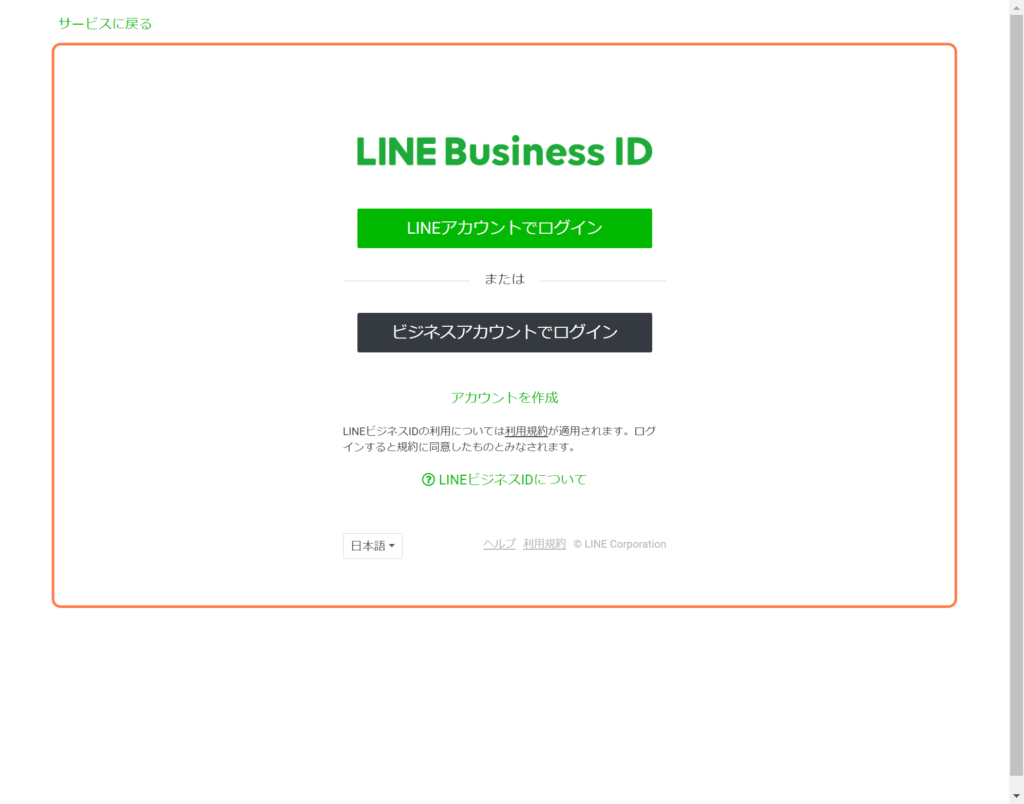
LINEアカウントまたはビジネスアカウントでログインします。
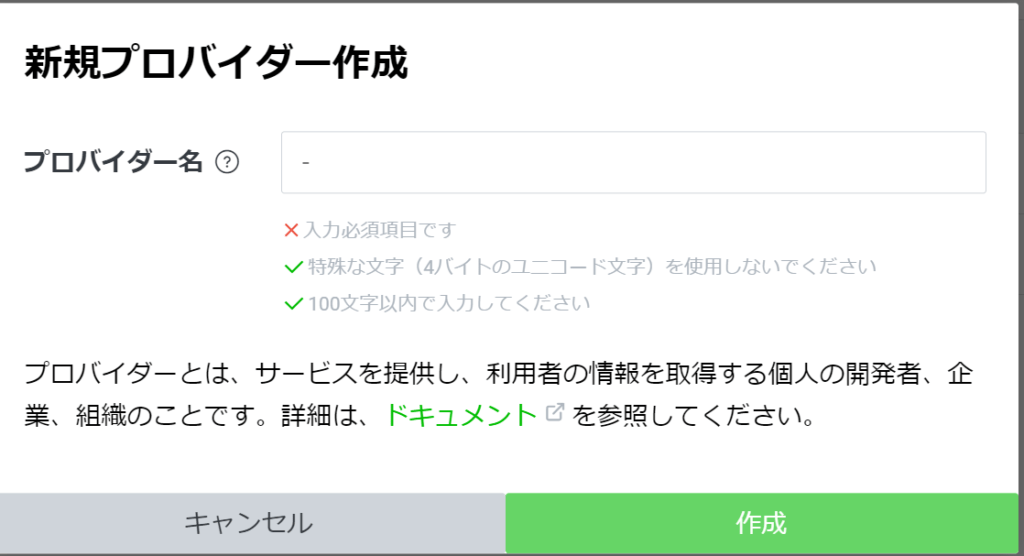
プロバイダー作成ボタンがあるので、押すと上記画面がでます。
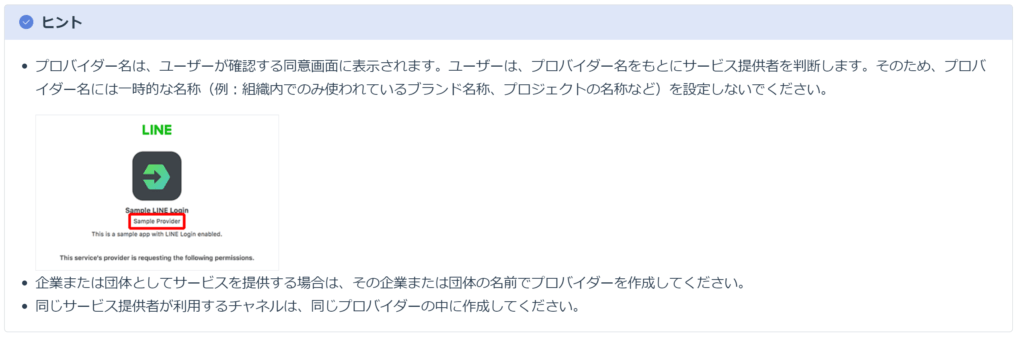
プロバイダー名を任意に付けて作成します。
チャネル作成
チャンネルを作成します。
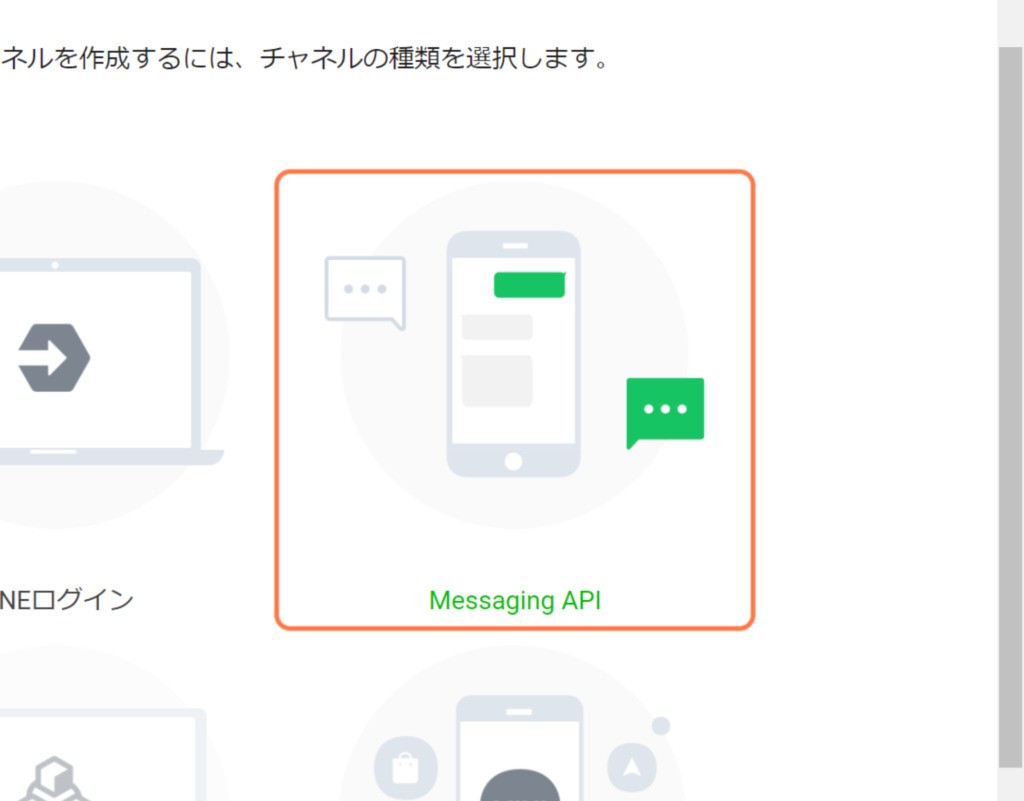
Messaging APIを選択。
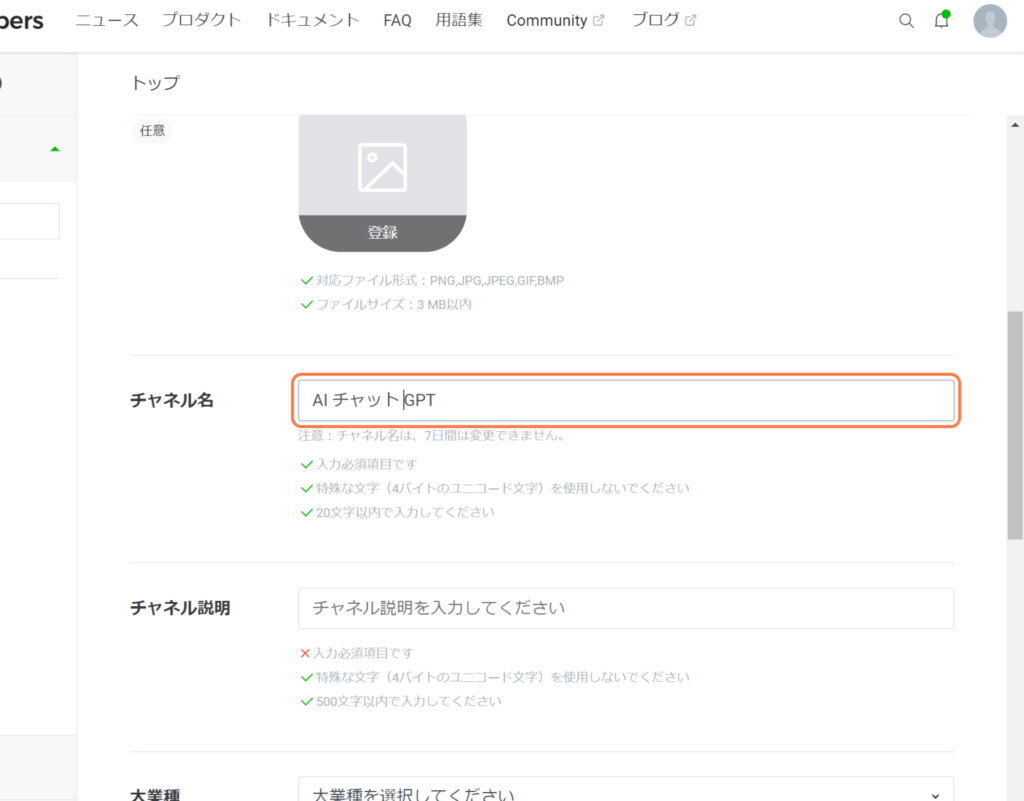
とりあえず、必須の項目を埋めてください。
チャネル名がBotの名前になります。
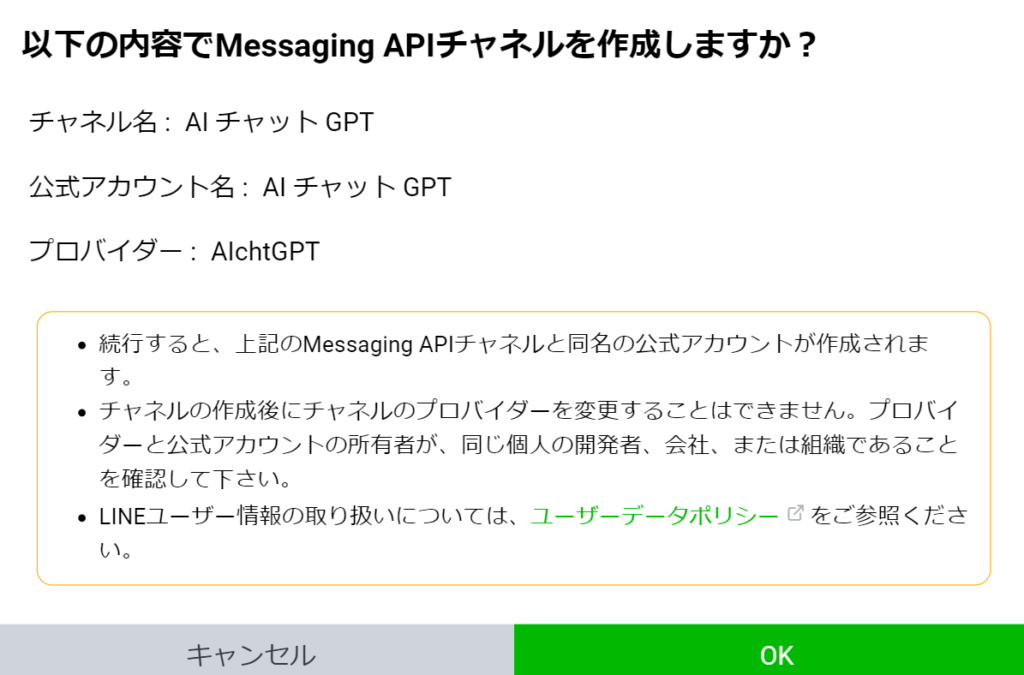
作成を押して、上記画面でOKを押します。
同意文章が出てきますが、読んで同意してください。
チャンネルアクセストークンの取得
Messaging API設定タブへ移動します。
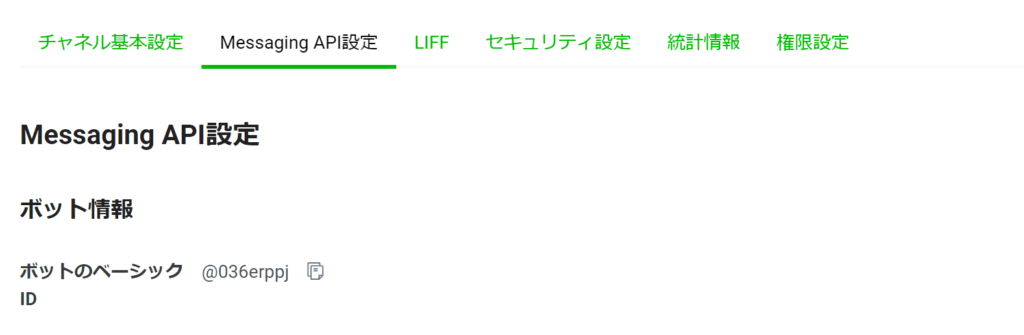

下のほうにチャンネルアクセストークンがあるので、発行を押します。
ここで出てきた文字列はあとで使います。
chatGPTのシークレットキーの取得
OpenAI(ChatGPT)のAPIを利用するためには、まず「アカウントの登録する必要があります。
アカウントの登録自体は無料で行うことができます。
シークレットキーを発行するには以下にアクセスしてログインしてください。
https://platform.openai.com/account/api-keys
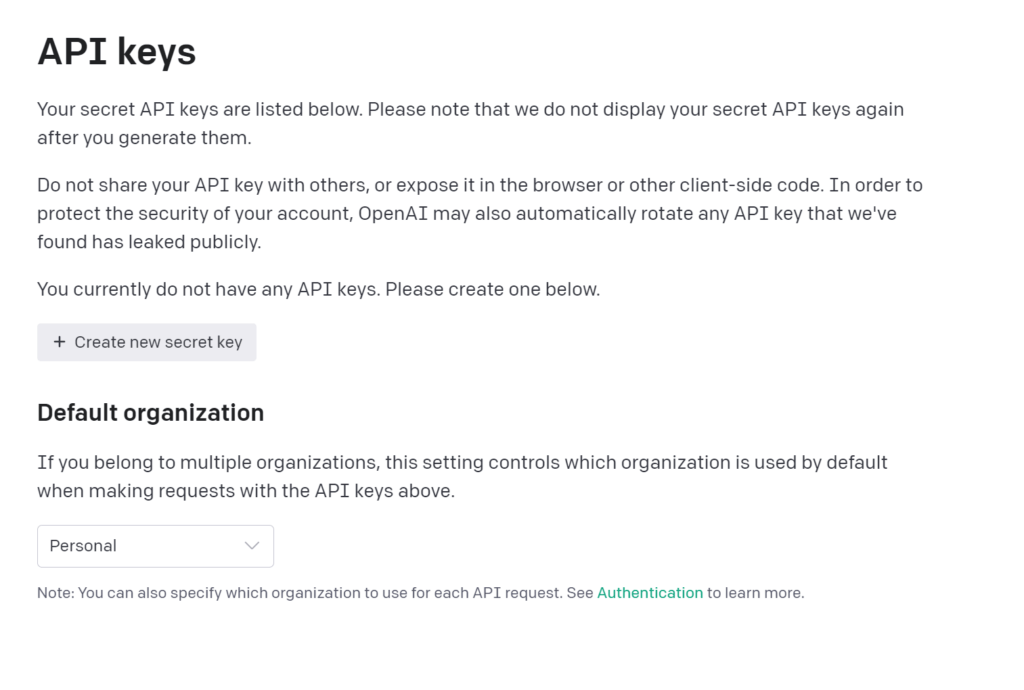
「create new secret key」を押すとシークレットキーが発行されます。
ここで出てきた文字列はコピーして保管しておいてください。
コピーしておかないと再度コピーできません。
もし消してしまったらもう一回「create new secret key」を押せば新しくシークレットキーを取得できます。
※発行自体に料金はかかりませんが、プログラムコードやサービス上で利用すると従量課金制で料金が発生します。初回登録時にもらえるクレジットをもらえていればちょっと遊べます。
Google Apps Script を作成
LINE Botサーバーをたててやることもできますが、今回はGoogle Apps Script(GAS)を使っていきます。
GASはGoogleのサービスを連携・自動化させるためのスクリプト言語です。
GASの特徴として以下があります。
- 無料で使える
- 開発環境が不要
そう、無料で手間いらずだから!
それでは以下にアクセスしてください。
https://script.google.com/home
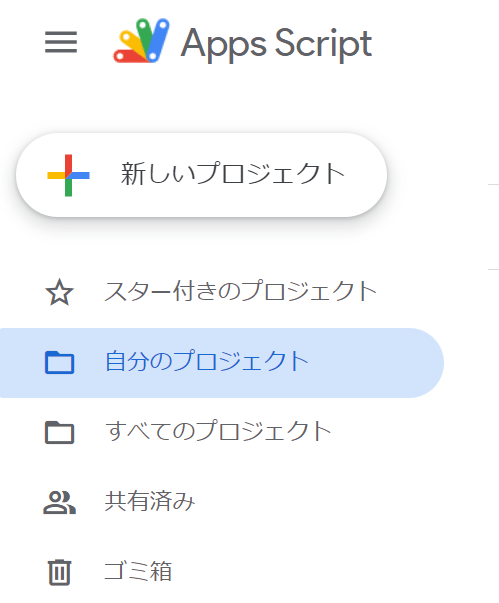
左上の新しいプロジェクトをクリックします。
APIキーはGASスクリプトに直書きすることもできますが、スクリプトをコピペやGithub管理など流出する可能性もあるようで、今回は、GASではスクリプトプロパティにAPIキーを格納してコードからスクリプトプロパティを読み込みます。

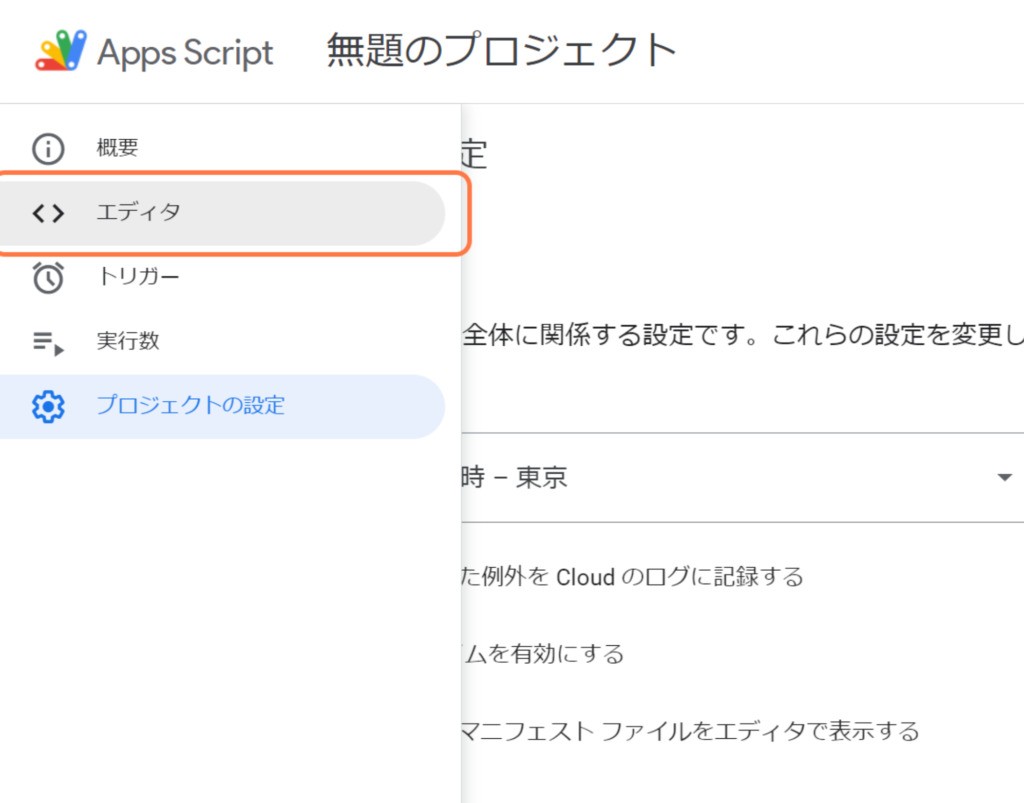
GASスクリプトエディタを開いたら、左メニューにある「プロジェクトの設定」をクリックします。
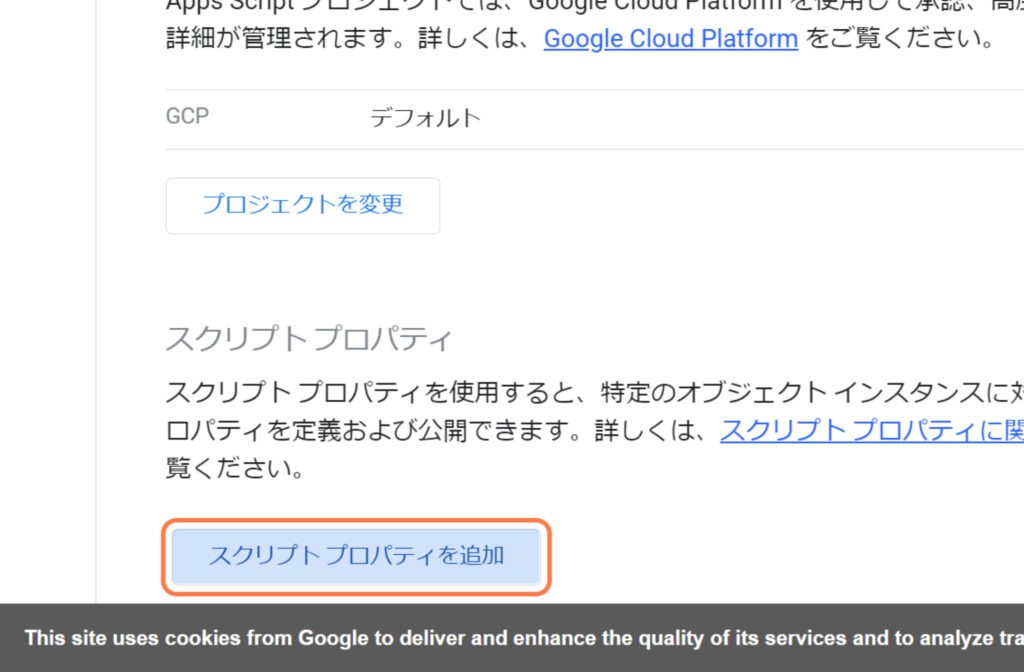
プロジェクトの設定画面をスクロールするとスクリプトプロパティの項目が表示されるので、「スクリプトプロパティを追加」を選択します。
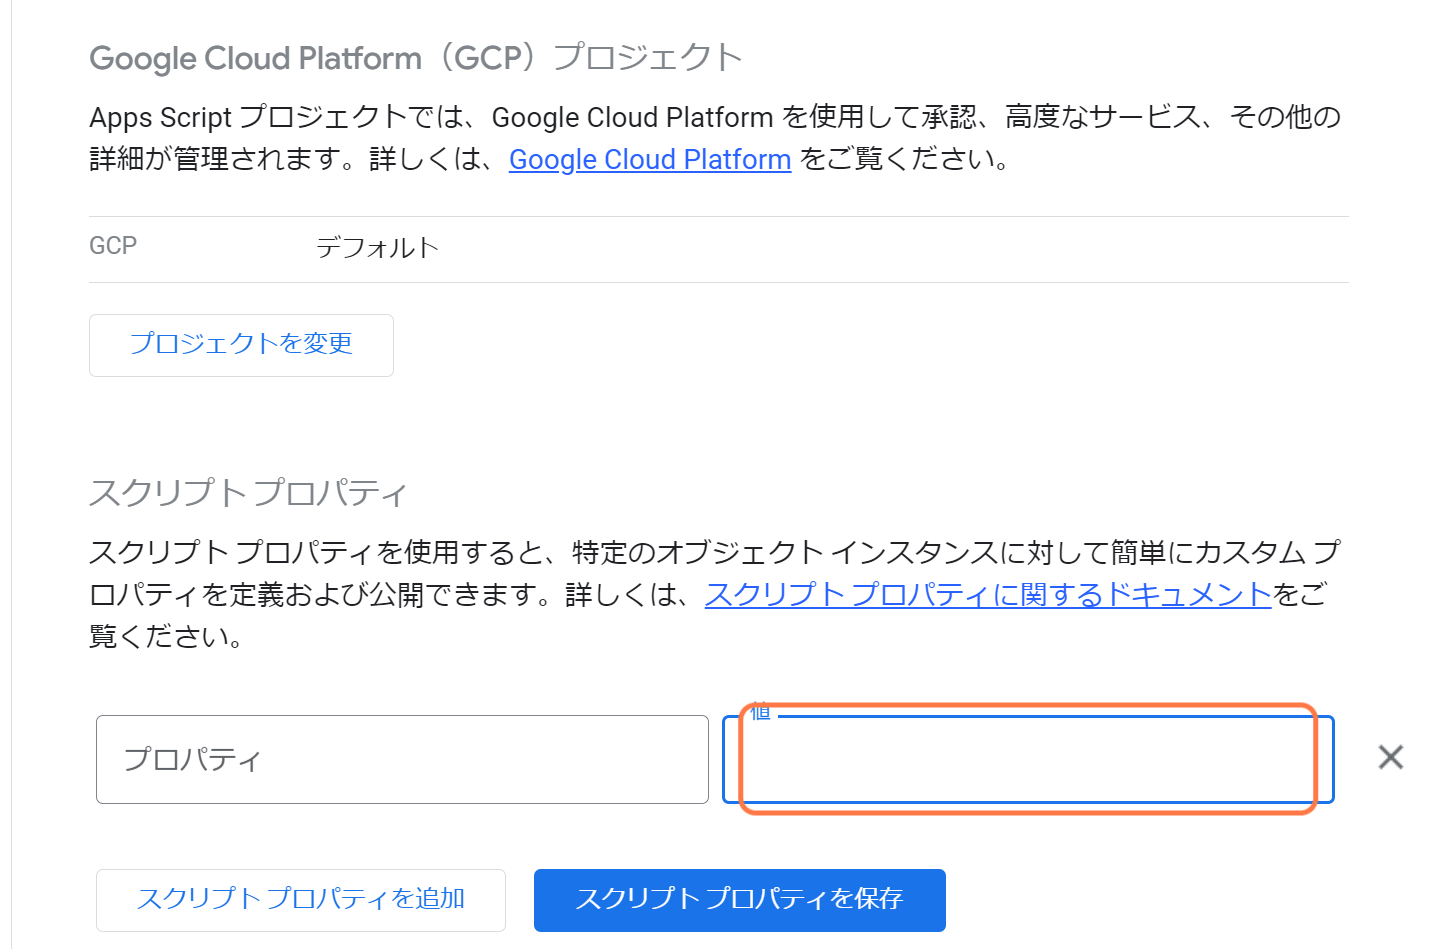
プロパティに「CHATGPT_APIKEY」と入れて、値に事前に取得したChatGPTのシークレットキーをコピペし、「スクリプトプロパティを保存」をクリックします。
もう1つスクリプトプロパティにプロパティにLINE_APIKEY、値にLINEで取得したチャンネルアクセストークンを入力します。
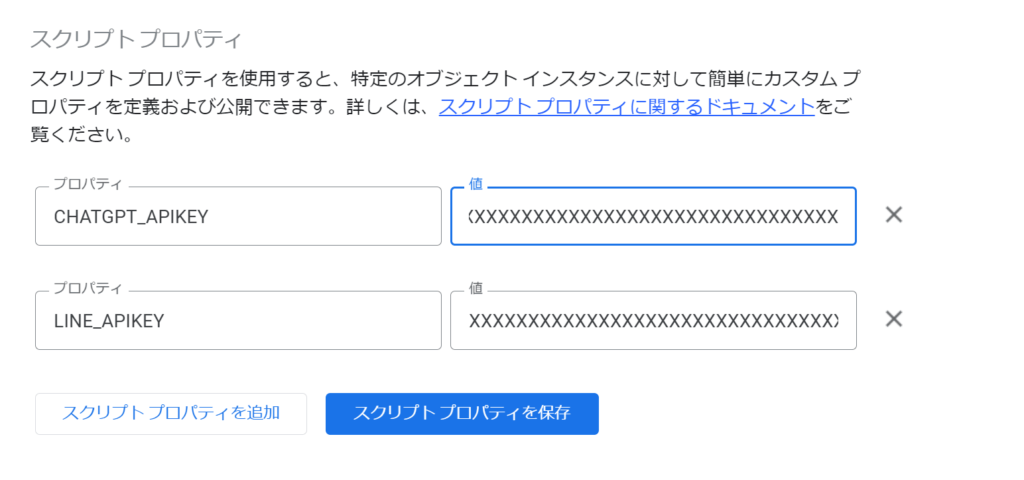
こんな感じ。
スクリプトプロパティを保存を押します。
エディタをクリックしてコードをコピペ。
//WebアプリにPOSTリクエストが送られた時に実行される関数
function doPost(e) {

  //スクリプトプロパティのAPIキーを取得
  const scriptProperties = PropertiesService.getScriptProperties();
  const chatGPT_apiKey = scriptProperties.getProperty('CHATGPT_APIKEY');
  const LINE_apiKey = scriptProperties.getProperty('LINE_APIKEY');
  //ChatGPT API エンドポイント
  const chatGPT_apiUrl = 'https://api.openai.com/v1/chat/completions';
  //LINE API エンドポイント
  const LINE_apiUrl = 'https://api.line.me/v2/bot/message/reply';

  //WebHook受信処理
  const event = JSON.parse(e.postData.contents).events[0];
  const replyToken = event.replyToken;
  let messages = event.message.text;

  //ChatGPT POST時のオプションパラメータを設定
  const chatGPT_options = {
    'headers': {
      'Authorization': 'Bearer ' + chatGPT_apiKey,
      'Content-type': 'application/json',
      'X-Slack-No-Retry': 1
    },
    'muteHttpExceptions': true,
    'method': 'POST',
    'payload': JSON.stringify({
      'model': 'gpt-3.5-turbo',
      'max_tokens': 1024,
      'messages': [{ "role": "user", "content": messages }]
    })
  };

  //リクエスト
  const response = JSON.parse(UrlFetchApp.fetch(chatGPT_apiUrl, chatGPT_options).getContentText());
  const text = response['choices'][0]['message']['content'].trim();

  //HTTPSのPOST時のオプションパラメータを設定
  const LINE_options = {
    'headers': {
      'Content-Type': 'application/json; charset=UTF-8',
      'Authorization': 'Bearer ' + LINE_apiKey,
    },
    'method': 'post',
    'payload': JSON.stringify({
      'replyToken': replyToken,
      'messages': [{
        'type': 'text',
        'text': text,
      }]
    })
  };

  //リクエスト
  UrlFetchApp.fetch(LINE_apiUrl, LINE_options);
}
最後にGoogle Apps Script をデプロイします。
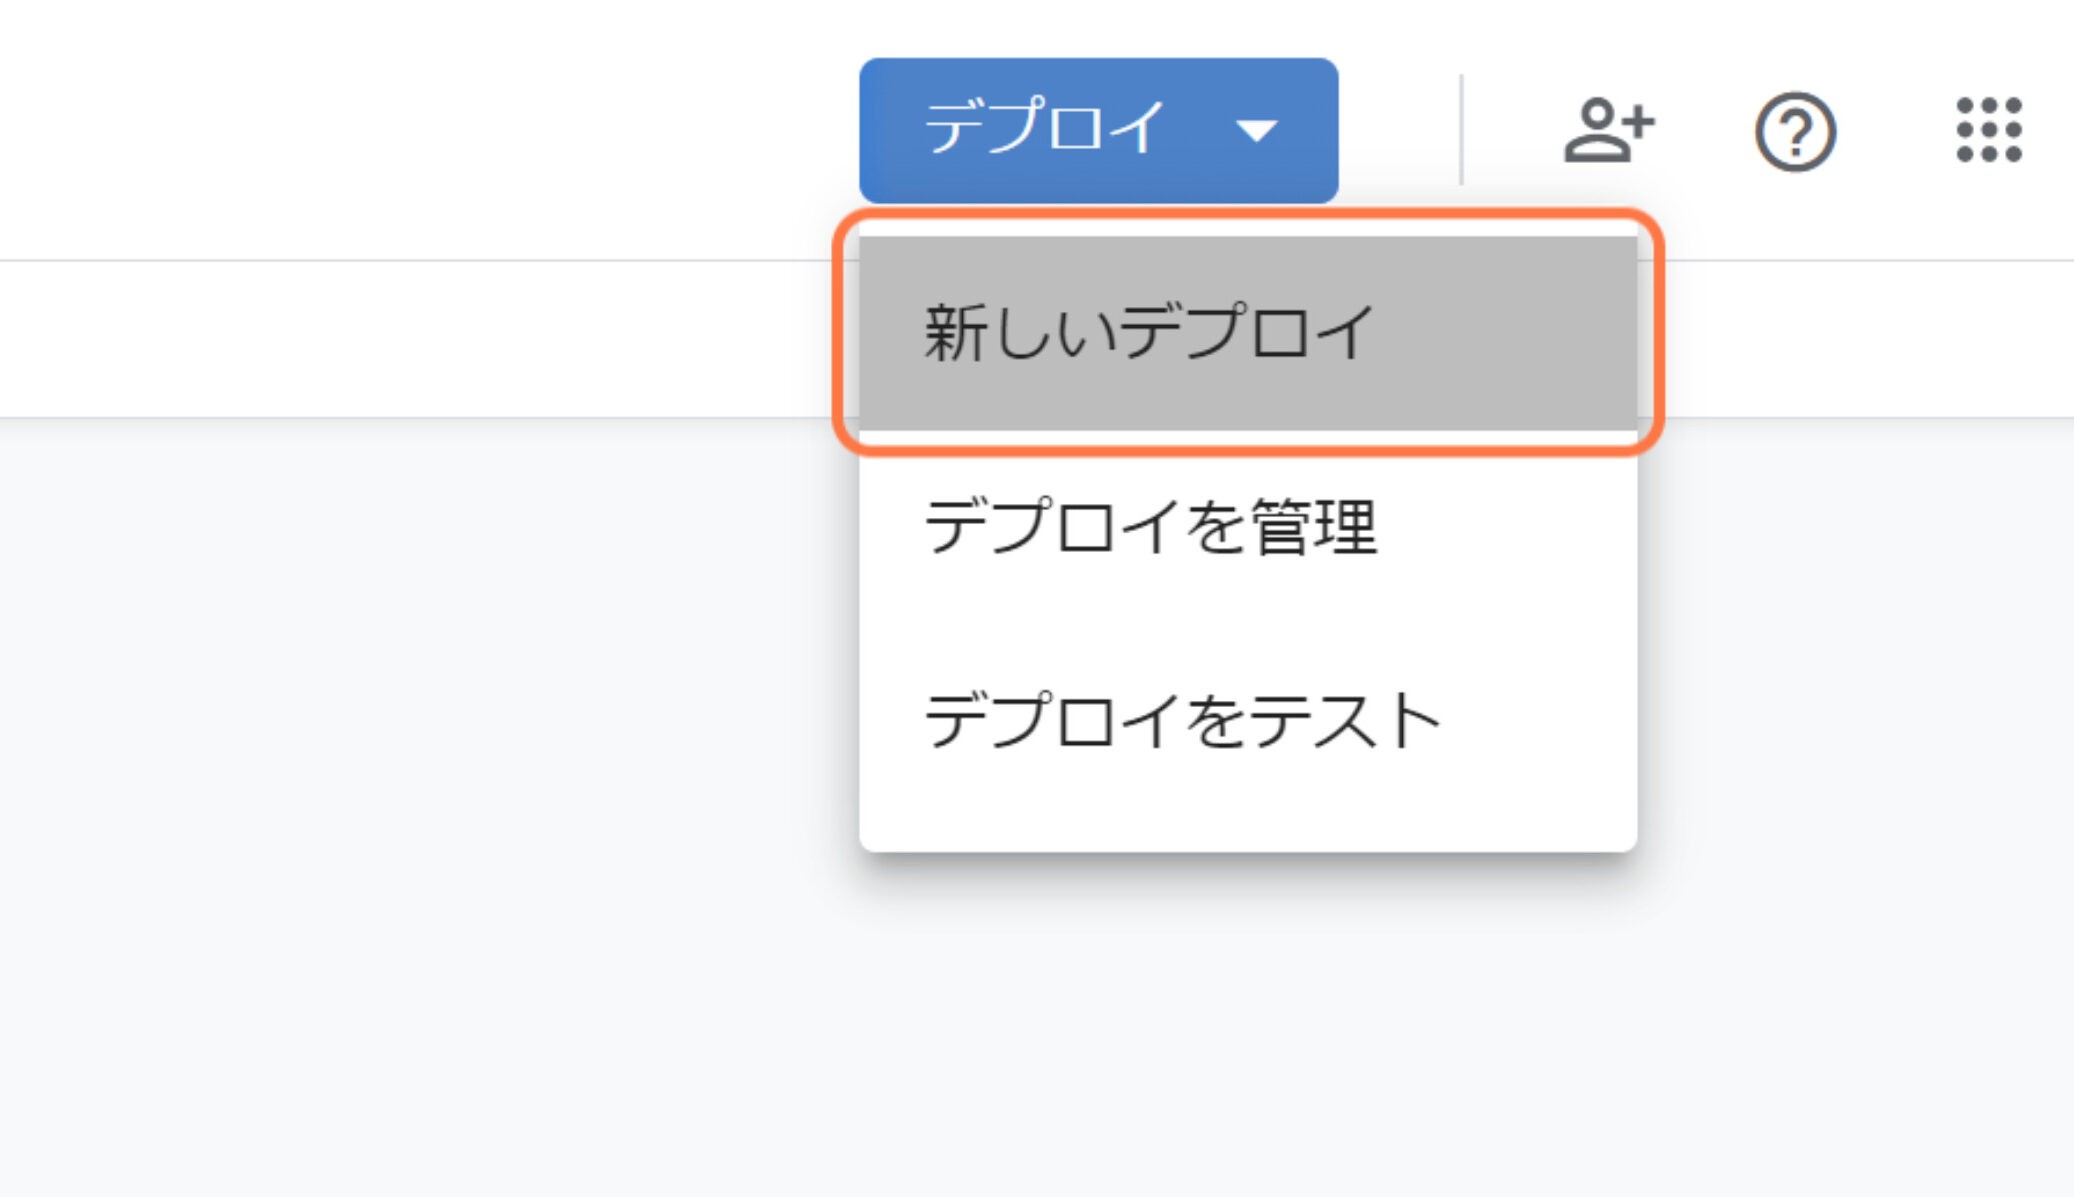
右上の「デプロイ」から「新しいデプロイ」をクリック。
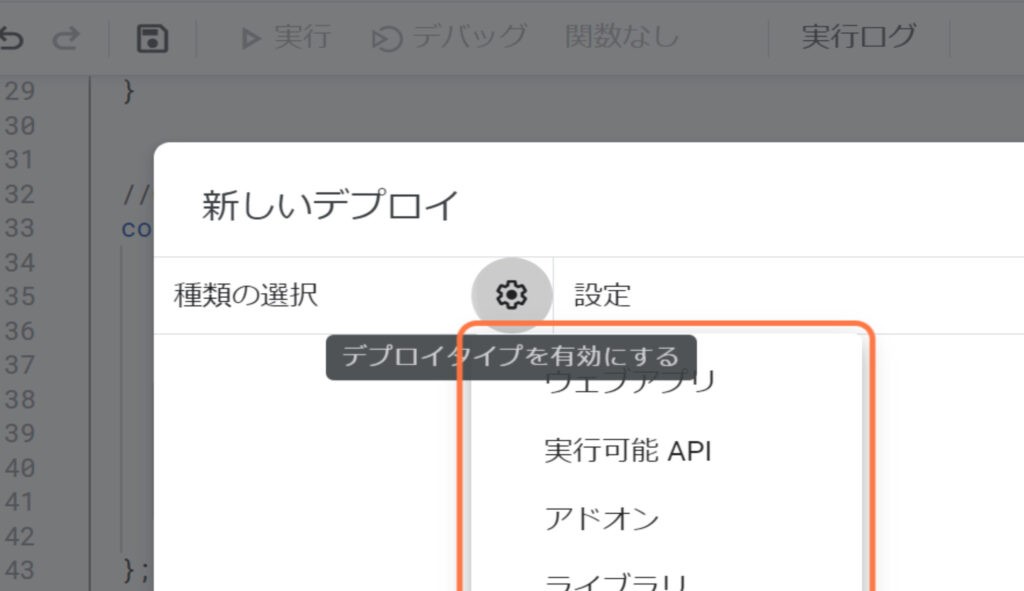
GASの新しいデプロイ画面で歯車アイコンをクリックし、「ウェブアプリ」を選択します。
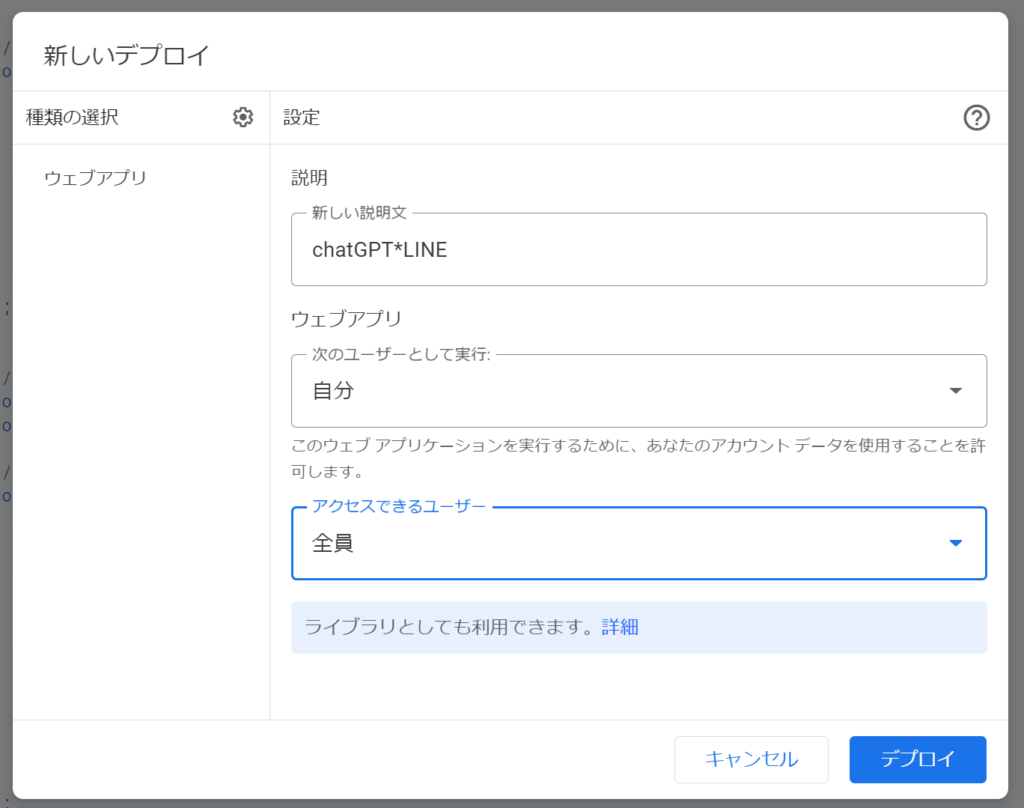
GASをウェブアプリとしてデプロイする際に、適当な説明文、次のユーザーとして実行を自分に、アクセスできるユーザーに全員を選択し、デプロイをクリックします。
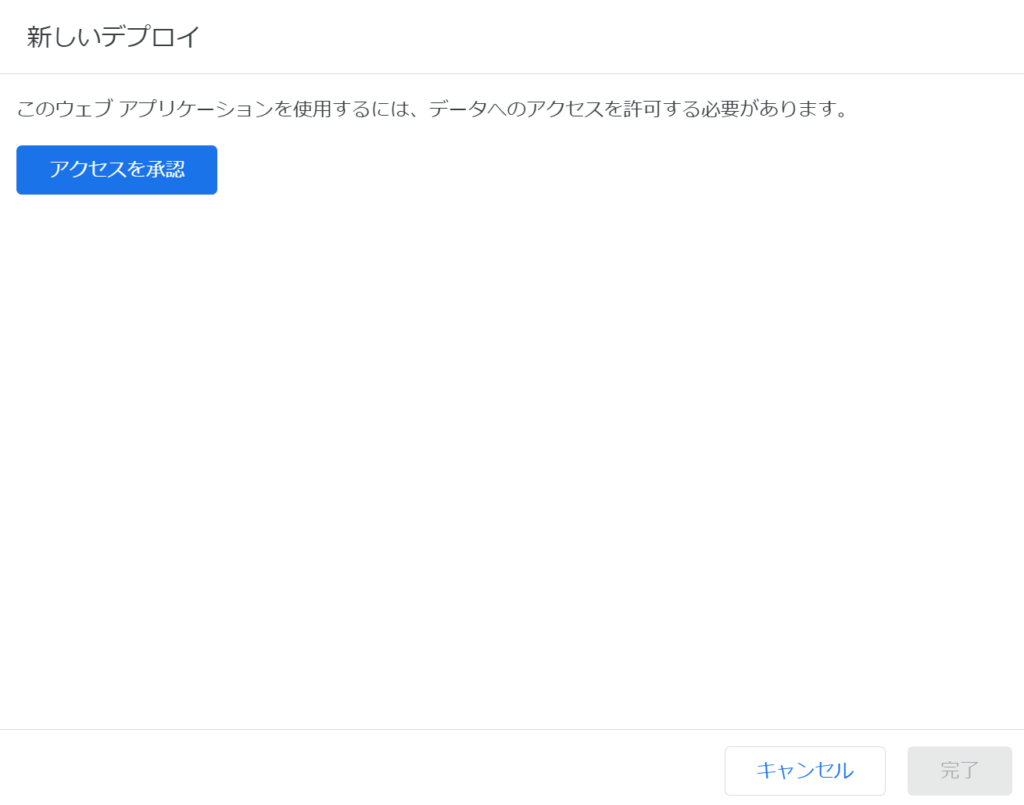
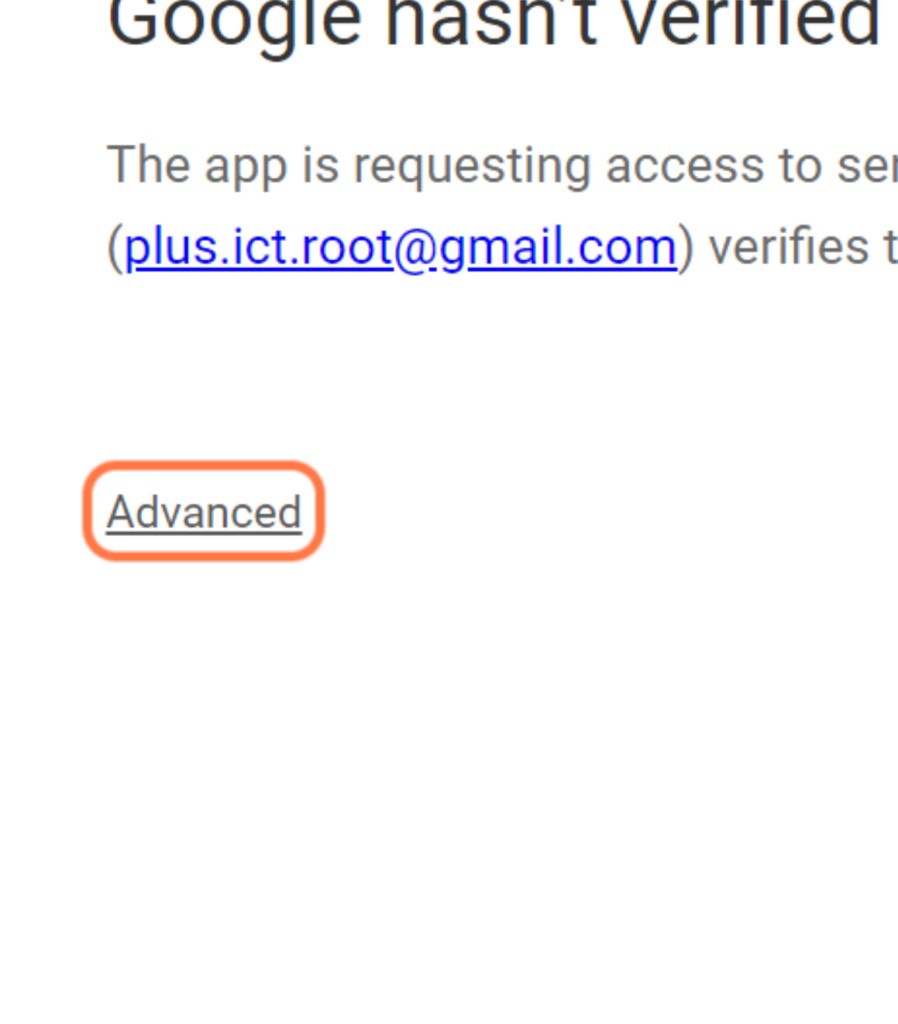
初めてデプロイする場合、承認が求められるので、「アクセスを承認」をクリックし、承認作業を行います。
Googleアカウントが出るのでクリックすると以下画面が表示されます。
順番にクリックして許可してあげます。
最後に以下の画面になります。
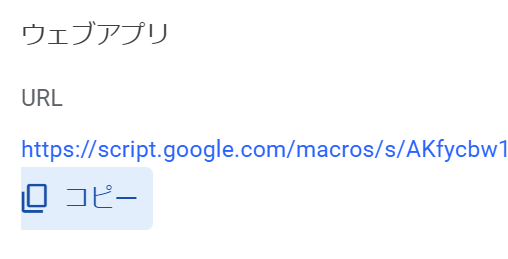
URLをコピーしてLINEに戻ります。
LINEのWebhookを設定
LINEのMessaging API設定画面にWebhookの設定という場所があるので編集を押します。
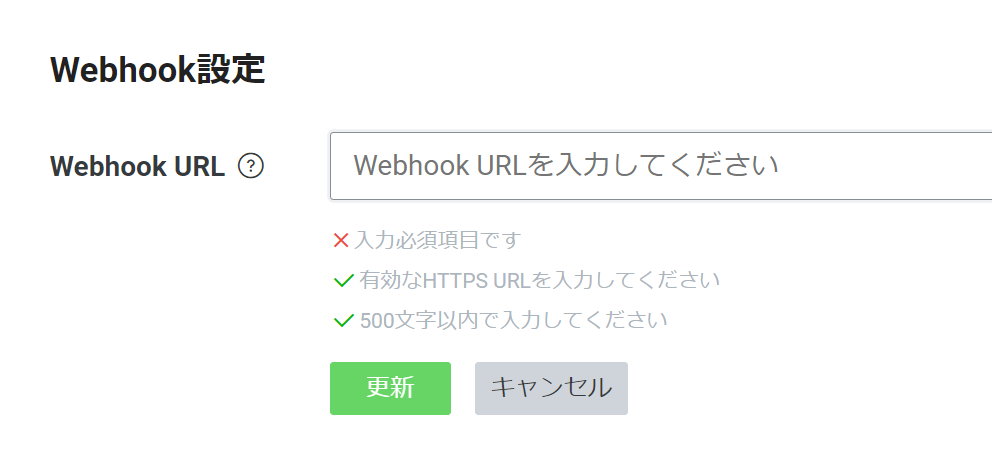
GASでコピーしたURLを貼り付けます。

Webhookの利用をONにします。
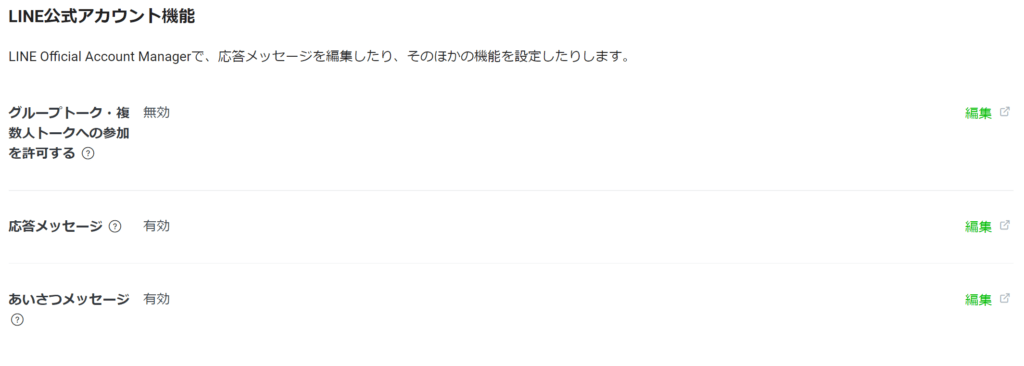
次に、下のほうにある応答メッセージの編集を押します。

応答メッセージをOFFにします。
完成!
できたのが以下です。
メモ
最後に調べた備忘録的なものです。
ChatGPTの利用料金は、OpenAIのページに「1000トークンあたり0.002ドル」です。
今の課金状態を調べる方法は、https://platform.openai.com/account/billing/overviewにアクセスして、「Payment methods」をクリックします。
無料プランであれば、以下のように、「You have not upgraded to a paid plan yet.」(まだ有料プランにアップグレードしていません。)と表示されます。
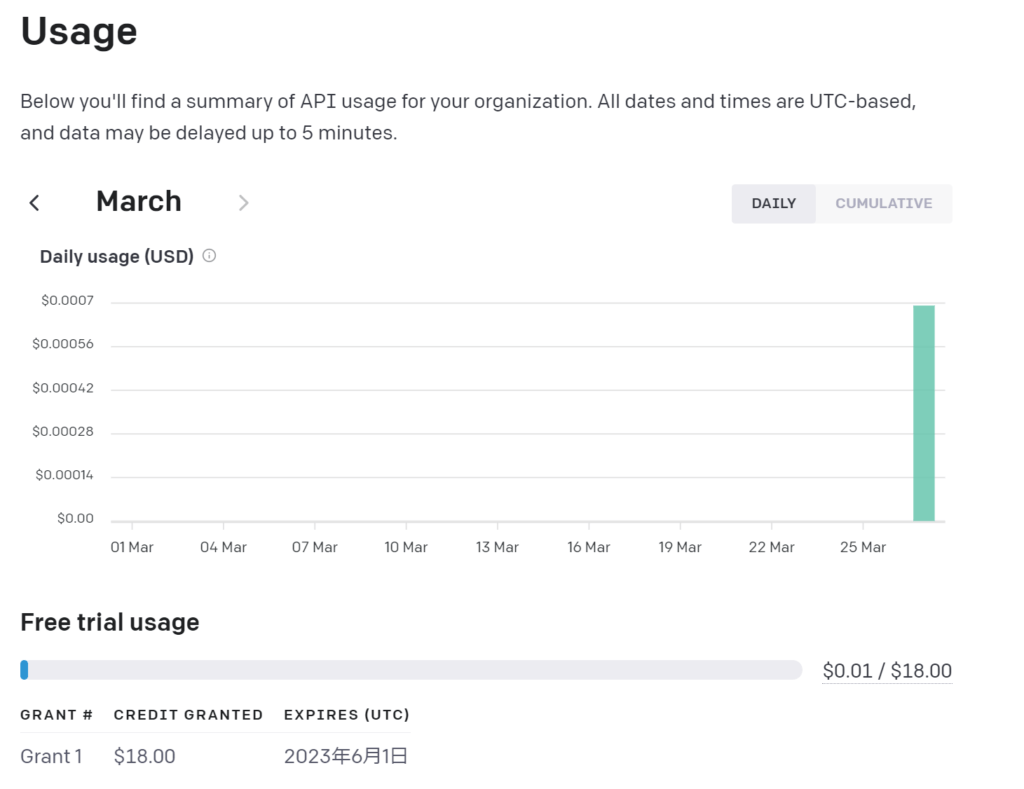
そこから以下にアクセスすると使用状況の確認ができます。
https://platform.openai.com/account/usage
API referenceは以下です。
https://platform.openai.com/docs/api-reference
GASの URL Fetchのコール回数(20,000回/1日)ですね。